[Welcome to the Sous-Chef Series, a new, sporadic feature on SK in which I invite invite cooks I admire over to my small kitchen to teach me — and thus, us — to make one of their specialties. Spoiler: I’m the sous!]
I first heard of the Russian restaurant Kachka when I was last in Portland, Oregon on book tour (hi, Powell’s!), when no fewer than a dozen people separately told me I had to go while I was there. A few said it wasn’t just their favorite restaurant in Portland, but their favorite restaurant, period. This made me all the more sad that I didn’t have time to make it happen. My regrets snowballed when I finally dug into the restaurant’s eponymous cookbook last summer. I was no further than the first page — where the confusion as to what is “Russian” food when “food from the former Soviet Union including Russia but also the countries surrounding it like Belarus, Latvia, Ukraine…” would be more accurate is humorously laid out — when I became deeply, emphatically obsessed with all that I’d missed.

The book is a delight on every page; a bit of history, a substantial amount of wry observations, some hilarious guides (how to navigate a Russian grocery store, the rules of the “drunk fest” known as a pyanka, how to “tetris” your zakuski spread, and I will never stop laughing about the day in the life of sauerkraut, kickbacks and all, in the former Soviet Union) and recipes that will make you want to take the vodka bottle from your freezer (or start keeping it there, have I not taught you anything), have a rowdy group of friends over, and cook, eat, and drink until you make plans for next time. I immediately bought another copy for my mother-in-law and a third for a friend. I could go on and on, but then we’d never get to the wild thing that happened last month.




A couple months ago, I received an email from the restaurant’s publicist that Kachka chef Bonnie Frumkin Morales would be in New York to cook a seder at the James Beard House (nbd!) and did I want to get coffee with her? No, I said. I have a better idea. Does she want to come over and cook with me in my small, terrible kitchen, specifically potato vareniki (Polish pierogi’s Ukrainian cousin)? I want to learn how to make them from a pro. Astoundingly, she said yes.

So, let’s talk dumplings. Even if you’re not self-described dumpling fanatic, even if your love language isn’t swaddled bundles of boiled or fried carbs, I’ve never met anyone who didn’t like pelmeni and vareniki — only people that have been unlucky not to have tried them yet. They use the same dough, but pelmeni are generally filled with meat (I have a recipe for Siberian Pelmeni in Smitten Kitchen Every Day); vareniki with vegetables, fruit, or cheese. Vareniki are often a little larger, but I prefer the one-bite-perfection of pelmeni, and make them the same size. Most Russians I know (and the one I’m married to) keep bags of each in their freezer for quick meals, and while they’re often quite good, nothing compares to making them at home. Manufactured dumplings require a dough stiff enough for machines and to hold up to shipping. Homemade doughs are much more tender and delicate. I see you running away, but wait! The dough is mixed and kneaded by hand and requires only a rolling-pin to stretch out — no pasta machines, no machines at all. It’s wildly forgiving. I did a downright sloppy job of sealing mine this week and not one of them tore or leaked.




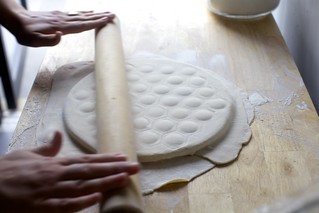
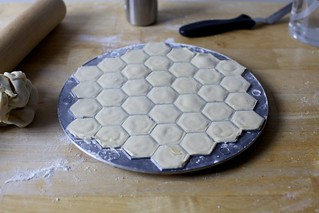
Back to the visit: After I forced my homemade chocolate croissant attempts (a recipe coming soon, I hope) and storebought coffee on Bonnie and her husband/business partner/road prep cook, Israel Morales, she showed me how to use the pelmenitsa I’d just purchased inexpensively online. Bonnie is a pelmenitsa enthusiast. She considers the mold “a perfection of Soviet design, all angles and efficiency striving towards a utopian future of dumplings for all.” It’s economical (no wasted dough), the 3-cm width is “the perfect bite”, the circular opening in the center of each is “the ideal void” to pack in more filling, and the speed — instead of folding one at a time by hand, you make 37 at a time — is pretty key when your restaurant makes as many as theirs does each day.



Still, a pelmeni mold is not a prerequisite for making Russian dumplings. You could use a potsticker mold, or you can form them by hand, either by folding them into half moons and crimping the edges, or in tortellini-like shapes. I’ll walk you through each. I hope you’ll make them. Even if you think you’re not a dumpling person or that this isn’t carbs-wrapped-in-carbs weather, these will shake every idea you have of dumplings to its core. They’re slippery and light where you’d expect heaviness; uplifting instead of nap-inducing. And the next time you reach for the same old freezer meal and find these instead, you’ll know you’ve won the lottery.


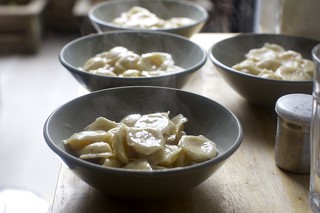
A pathetic sidebar: Because I’m bad at, well, calendars, I hadn’t realized until much later than I should have that Vareniki Day was also Seder Day, the first night of Passover, when I had 17 people coming over for dinner. Maybe you’re thinking, “Cool! You can feed everybody vareniki made by a fancy chef!” I briefly thought this too, then I remembered basically the only rule of Passover — ha! Anyway, it was a wild and fun day but I’m going to schedule my visiting chefs and multi-course dinner party days separately next time, just the same.

Previously
One year ago: Ruffled Milk Pie and Pasta Salad with Roasted Carrots and Sunflower Seed Dressing
Two years ago: Tall Fluffy Buttermilk Pancakes and Potatoes Anna
Three years ago: Failproof Crepes + A Crepe Party, Crispy Tortellini with Peas and Proscuitto, Confetti Cookies and Roasted Carrots with Avocado and Yogurt
Four years ago: Not Derby Pie Bars, Liege Waffles and Mushrooms and Greens with Toast
Five years ago: Strawberry Rhubarb Crisp Bars and Soft Pretzel Buns and Knots
Six years ago: Japanese Cabbage and Vegetable Pancakes
Seven years ago: Warm, Crisp and a Little Melty Salad Croutons and Chocolate Buckwheat Cake
Eight years ago: Creme Brulee French Toasts, Leek Toasts with Blue Cheese, Vermontucky Lemonade, and Easy Jam Tart
Nine years ago: Endive and Celery Salad with Fennel Vinaigrette, Rhubarb Cobbler, and Broccol Slaw
Ten years ago: Brownie Roll-Out Cookies, Green Bean and Cherry Tomato Salad
Eleven years ago: Martha’s Macaroni-and-Cheese and Crispy Salted Oatmeal White Chocolate Cookies and Cherry Cornmeal Upside-Down Cake
Twelve years ago: Raspberry-Topped Lemon Muffins
And for the other side of the world:
Six Months Ago: Drop Cornbread Biscuits
1.5 Years Ago: Dutch Apple Pie
2.5 Years Ago: Apple Strudel and Root Vegetable Gratin
3.5 Years Ago: Chocolate Peanut and Pretzel Brittle, Kale and Caramelized Onion Stuffing, and Apple Cider Sangria
4.5 Years Ago: Sticky Toffee Pudding, Pickled Cabbage Salad, and Pretzel Parker House Rolls
Potato Vareniki
- 1 1/2 pounds (680 grams) yukon gold potatoes, peeled and diced (weight is for whole potatoes)
- 1 cup plus 2 tablespoons milk, any variety
- 1 teaspoon kosher salt
- 2 tablespoons unsalted butter
- A few grinds of black pepper
- 1 1/2 pounds (680 grams) yukon gold potatoes, peeled and diced (weight is for whole potatoes)
- Whole milk, as needed
- 5 tablespoons (70 grams) unsalted butter
- 1 teaspoon kosher salt
- 1 large egg plus 1 yolk, whisked until uniform
- 5 tablespoons (55 grams) fine semolina flour
- 2 teaspoons chopped fresh dill (optional)
- 3 1/2 cups (450 grams) all-purpose flour, plus more for counter
- 1 tablespoon kosher salt (Diamond brand, use half for any other brand)
- 1 large egg
- 3/4 cup plus 2 to 3 tablespoons cold water
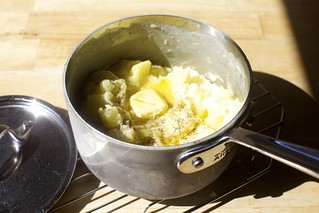
- A combination or your choice of: Butter, plain vinegar, minced fresh dill, caramelized onions, sour cream (bonus if you find the extra-rich stuff from a Russian store). Shown up top is Kachka’s sauerkraut powder (their own recipe, dehydrated and ground) and I’d be remiss if I didn’t tell you that these are served with a caviar buerre blanc at the restaurant, the recipe is on p. 304 in the cookbook
Simple potato filling
Luxurious potato filling
Dumpling dough
To serve
For the luxurious potato filling: Place potatoes in medium saucepan and add as much milk as you need to cover the potatoes. Bring to a simmer and cook, stirring occasionally, until potatoes are cooked through, about 15 minutes. Strain off milk, saving 2 tablespoons, discarding the rest. Place cooked potatoes and reserved milk back in pot and use a potato masher to gently bring the ingredients together. Transfer potato mixture to a sieve and use a spoon or bowl scraper to push it through. Once potatoes are passed, let mixture cool to room temperature. Use a spatula to gently fold in egg until just combined. Add semolina and mix until uniform, trying not to overwork the mixture. Add dill, if using. Place in refrigerator until fully cooled before using.
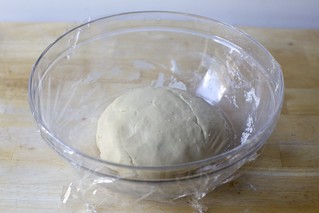
Make the dumpling dough: Combine flour and salt in a large bowl with a fork. Add half the water and the egg and use the fork to mix them into the dough. Drizzle in all but last 1 tablespoon of remaining water, mixing as you pour until dough forms shaggy clumps. Use your hands to bring the dough together inside the bowl, using the last tablespoon of water if needed. Knead it several times in the bowl before transferring it to your counter. Knead dough for 10 to 12 minutes (set a timer; don’t skimp!) until it forms a smooth, elastic dough. Return to empty bowl and cover bowl tightly with plastic wrap. Let rest at room temperature for 1 hour, which relaxes the dough and makes it easy to roll thin.
You can also make the dough in a stand mixer, using the dough hook to knead for 5 to 7 minutes.
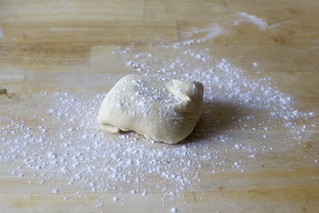
Form vareniki, both methods: Grab a spray bottle of water (or a dish of water and a pastry brush, although just your finger is sufficient for hand-formed dumplings), a rolling pin, and liberally dust a rimmed baking sheet with flour. Remove one-quarter of dough (for hand-formed dumplings) or one-sixth of dough (for pelmenitsa dumplings) from bowl, keeping the rest wrapped until needed. On a very well-floured counter (Bonnie explains that the dough will only absorb as much flour as it needs and no more, so you cannot use too much) and roll it out on a lightly floured countertop until it’s thin enough that you can see light through it if you hold it up; you should be able to roll it to the thinness of pasta dough.
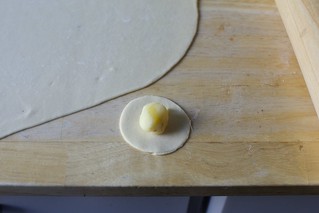
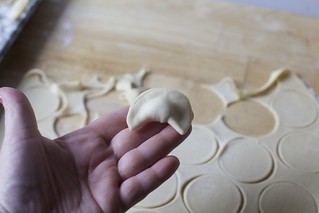
Form vareniki by hand: Cut out rounds of dough with a 2-inch round cutter or a drinking glass. Using two spoons, a small scoop, or a pastry bag, fill each round of dough with a blob of filling — about 1 teaspoon. Dab, brush, or mist the edges of the dough with water, then fold the round into a half-circle, pressing the edges to seal. Take the edges and pull them towards each other, pinching the corners to seal in a tortellini shape. As you shape a few dumplings, you’ll get a sense of how much filling you can stuff into each dumpling and still stretch the dough around it to seal. Transfer the shaped dumplings to your prepared baking sheet. Gather the scraps together back into the ball. Repeat with the remaining dough and filling, rerolling the scraps after they’ve rested enough that you can roll them out again. (If they resist rolling, wait 5 minutes, try again, repeating this until the scraps roll as thinly as the first round did.) I like to slide my tray of vareniki into the freezer while working on the next batch; they’re easier to move around once semi-frozen. At this point, you can cook them right away — semi-frozen or fresh — or freeze them for future use. (Freeze the rest of the way on the baking sheet so they don’t stick, then transfer to sealed bag).
Form vareniki with a pelmenitsa: Drape the rolled-out dough over your pelmenitsa, so that it reaches over the ends of the mold. Press or pat the dough lightly so that an imprint of the mold below is made on the dough; this is so you know where to center the filling. With two spoons, or a pastry bag fitted with a wide tip, scoop or pipe a little blob of filling into each of the 37 divots. You’ll need just a heaping teaspoon or so in order to still be able to seal things (don’t get carried away with the amount of filling!). When you have piped filling into all the slots, roll out a second piece of dough until it’s slightly larger than your mold. Lightly spray some water over the top of your filled vareniki, or lightly brush the exposed dough with water if you don’t have a spray bottle, and then gently place the second round of dough over the top. Firmly roll over the top with your trolling pin, several times as needed, to seal the vareniki and cut the dough between them. Remove the outer trimmings that are not part of the dumplings themselves. (Depending on how thin I’ve gotten the dough, I can reuse these to make a 4th pelemenista of dumplings, hence the range in yield. Let the dough rest until it rolls easily again.) Turn the pelmenitsa upside-down over the prepared baking sheet and nudge the filled dumplings out. Don’t worry if they don’t separate right away. Slide the tray into the freezer while you repeat with the remaining dough and filling. (Once they are firm, you can easily break them apart.) You can cook them right away — semi-frozen or fresh — or freeze them for future use. (Freeze the rest of the way on the baking sheet so they don’t stick, then transfer to sealed bag).
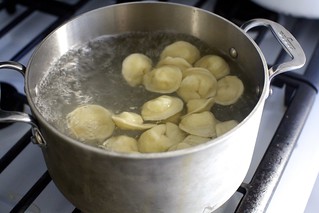
Cook your vareniki: Bring a large pot of salted water to a boil. Add the dumplings, about 20 per person (or 12 to 15 if they’re larger). Adjust the heat as needed to maintain a healthy-but-not-too-vigorous boil. Add the dumplings and give it a few good stirs, making sure none stick to the bottom of the pot. Cook until the dumplings rise to the surface, and then 1 minute more (this will take 4 to 5 minutes). If you’re not sure if they’re done, you can always remove one and cut it in half — it should be hot in the center.
Finish and serve: While the dumplings cook, prepare a mixing bowl to dress your dumplings. Everyone likes their vareniki a little differently but I’ve been forever converted to Bonnie’s method. For each serving, you want to place a good pat (about 2 teaspoons to 1 tablespoons) of butter and 1 to 2 teaspoons of plain vinegar in the bottom of your bowl. Add salt and pepper, if you wish. When the vareniki are done, use a large slotted spoon (this is my favorite) to transfer the dumplings, shaking off the extra water, right into the bowl. Toss! The butter will melt and come together with the vinegar from the heat of the dumplings. Keep stirring, whirling everything together until the vareniki look glossy and lightly sauced and you are astounded by your newfound cheffy skills. Transfer to individual bowls and let everyone add the finishes they wish.
Do ahead: The simple potato filling is good in fridge for 4 to 5 days, the luxurious one for 2 days.
Source: http://feedproxy.google.com/~r/smittenkitchen/~3/ThI3_4xOXUo/