

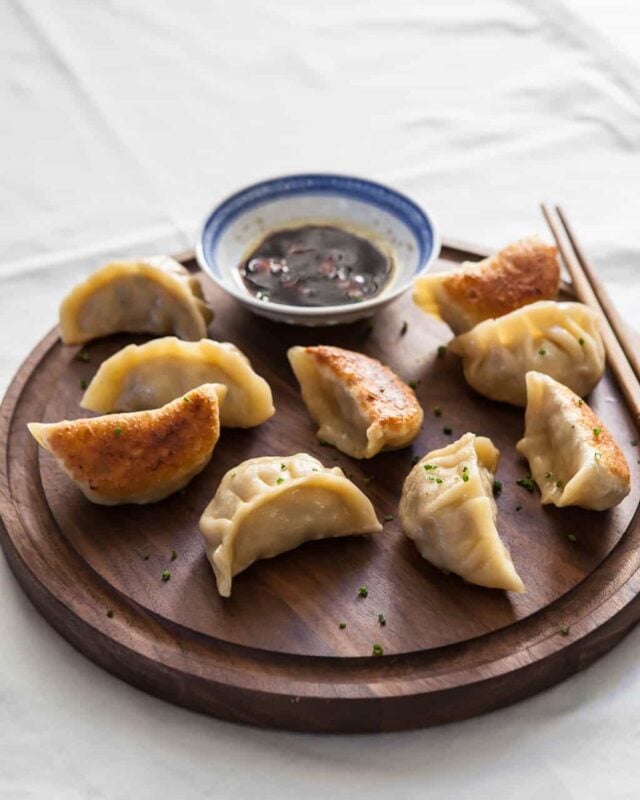
What you’ll learn in this recipe:
- Perfect potstickers from scratch – crisp bottoms that are not greasy, steamed filling that’s not soggy
- Step by step how to make Mom’s homemade wrappers with a bowl, spoon & rolling pin
- Loaded with tips from my Mom, who has been making potstickers from scratch for over 40 years
Potstickers – Lunch, Dinner, Dim Sum or Brunch!
A couple of weeks ago, I chatted with Bobby Flay over the phone. He’s just launched his new book, Brunch at Bobby’s: 140 Recipes for the Best Part of the Weekend – but there were no Asian inspired recipes! Bobby! Where’s the dim sum? Just kidding. We did talk about his favorite dim sum place in San Francisco – and his love for Lobster Ginger Potstickers. So, my Mom and I are dedicating this post to Bobby Flay: Perfect Potstickers with wrappers made from scratch. We did test making a batch of lobster potstickers, but I think lobster is best for steamed dumplings (not pan-fried), a more delicate method of cooking.
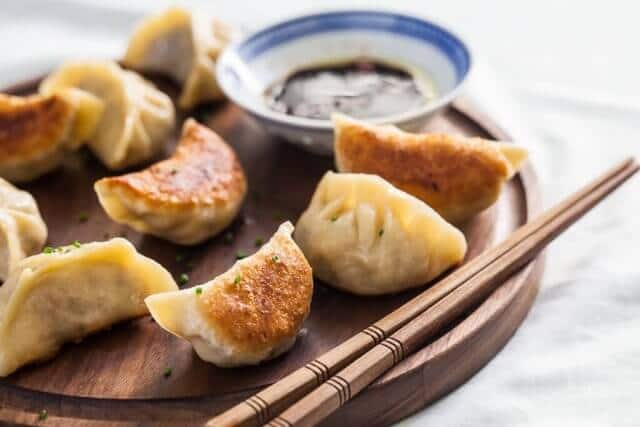
How to Make the Best Potstickers
The perfect potstickers, whether you are making Korean Guun-Mandu, Japanese Yaki-Gyōza or Chinese Guōtiē (Mandarin) / Wortip (Cantonese) are pan fried, crisp-crunchy bottoms without being greasy, and steamed, flavorful filling that’s not soggy. The dumpling skin has the perfect bite to it, and the folds of the potsticker are not gummy or too thick.
This is my Mom’s hot-water dough recipe. We’ll show you step by step how to make the wrappers from scratch (all you need is 3 ingredients, a bowl, spoon & rolling pin!), how to perfectly fold the crescent shaped dumplings and how to cook the dumplings so they turn out neither too greasy nor soggy.

Why Hot Water Dough?
The perfect dumpling wrapper uses both hot water AND cold water. Adding boiling hot water to flour cooks the flour just enough to denature the protein and prevent much of the gluten from forming. Asian dumplings wrappers don’t need a lot of gluten – we want our wrappers to be soft, relaxed enough to fold easily, but still with enough structure to hold its shape. The right combination of hot water and cold water will do the trick. Too much hot water and the dumplings will sag and be too soft. Too little hot water will make the dumplings too chewy.
There are only 3 ingredients to homemade potsticker wrappers – and even one of these ingredients is optional.
Flour + Salt + Water (2/3 cup boiling, 1/3 cold)
Ingredients
2 1/2 cups all-purpose flour
1/4 teaspoon salt
2/3 cup boiling hot water
1/3 cup cold water
To a large bowl, measure in the flour and salt, give it a little stir.
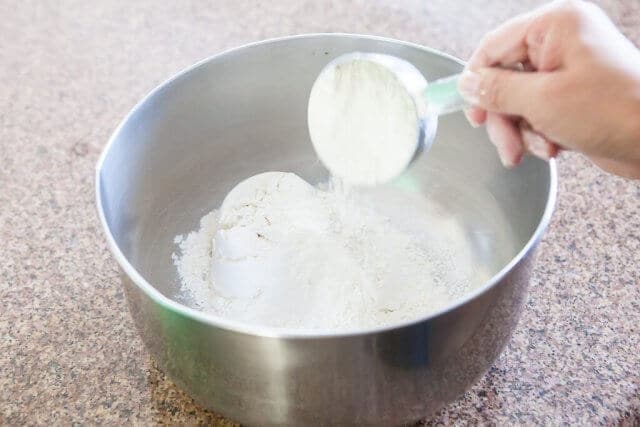
Add the just-boiled hot water (tip: water in a coffee cup, microwaved until just about to boil is just fine)
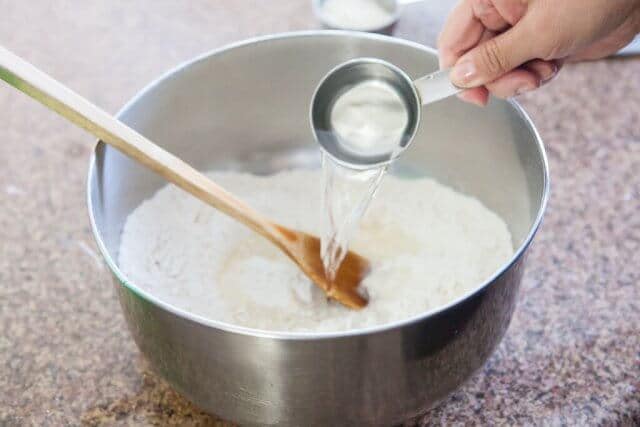
Quickly stir with chopsticks or a wooden spoon.
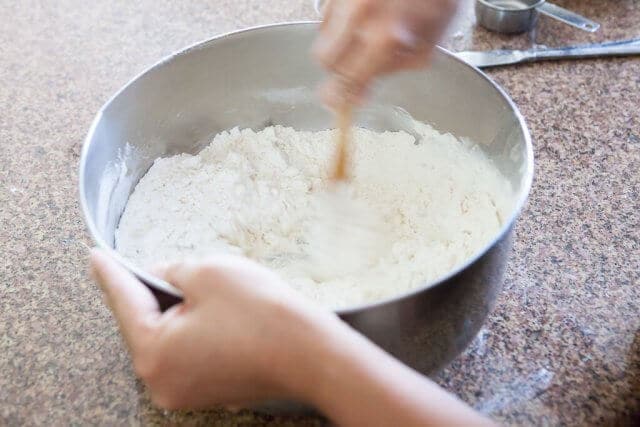
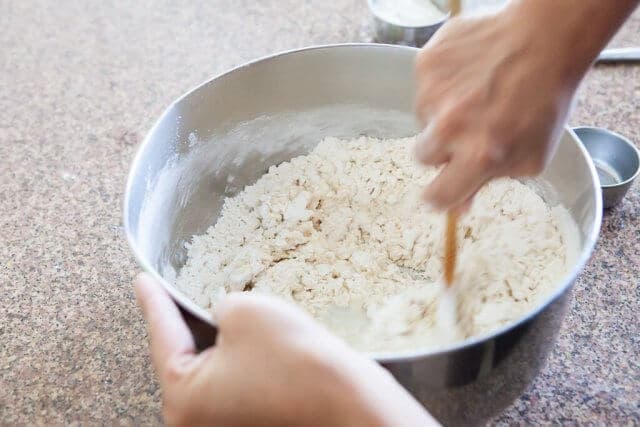
Once it becomes a crumbly mixture, add in the cold water (tip: use ice-cold water, or water from your refrigerator)
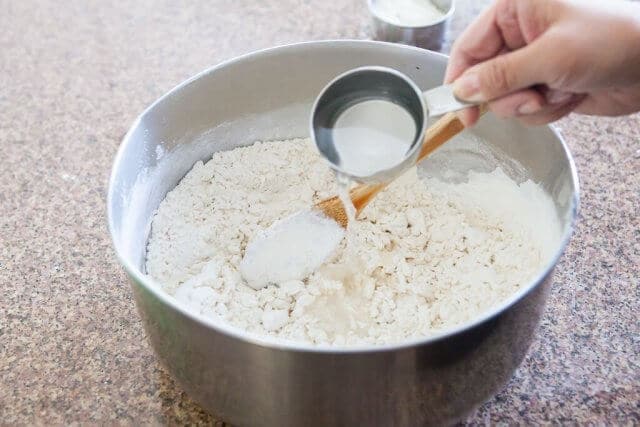
Quickly stir vigorously.
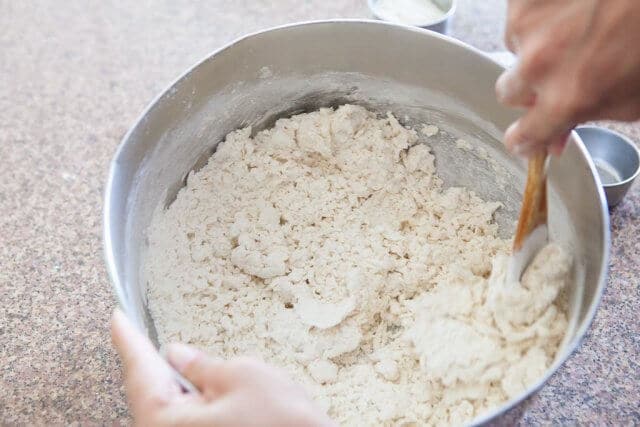
Until the flour becomes a scraggly mess.

Put your wooden spoon down and it’s time to work the dough with your hands. Begin kneading the dough in the bowl, working to pick up all of the dough on the sides of the bowl. Use the heel of your hand to knead.
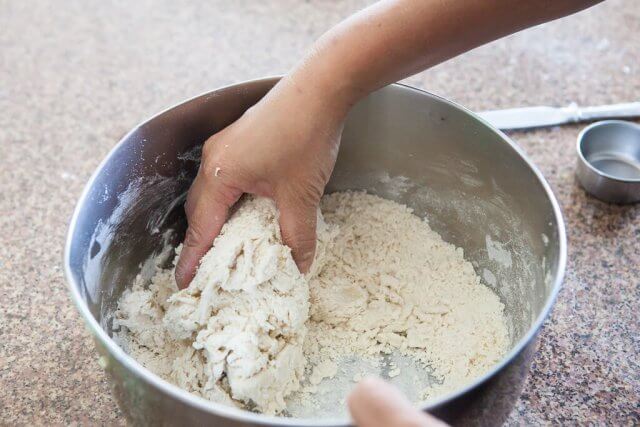
This should take 2 minutes. You’ll see the dough turn from crumbly to forming a large ball of dough.

Once you’ve got a rough ball of dough (and there’s barely any dough left in the bowl) turn the dough out onto your clean work surface to continue kneading. You shouldn’t need any additional flour on your counter, the hot water makes the dough much easier to work with and less sticky. But, if the dough really sticks to your counter, feel free to use a small amount of flour to dust the surface.
Remember to use the heel of your hands and the meaty parts of your thumbs. In kneading, there are no fingers involved – you can put your fingers away 
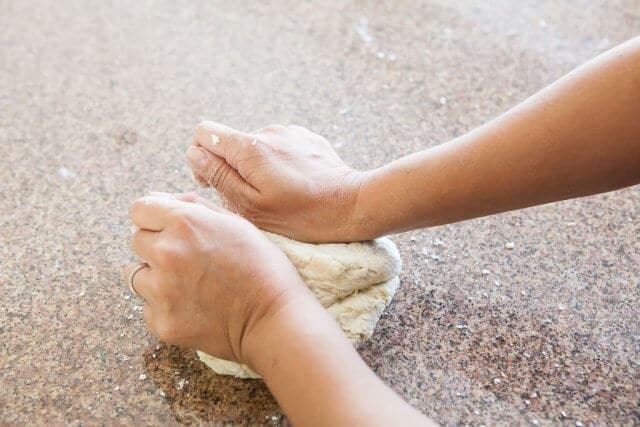
Knead, push, rotate, fold and repeat.
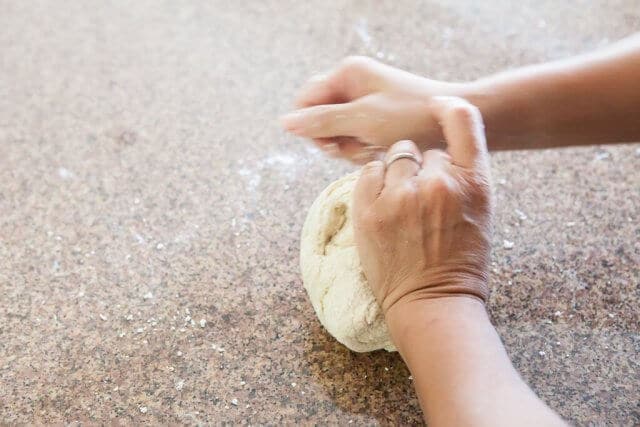
In just a couple of minutes, your dough will become smoother. It’s not quite ready yet.
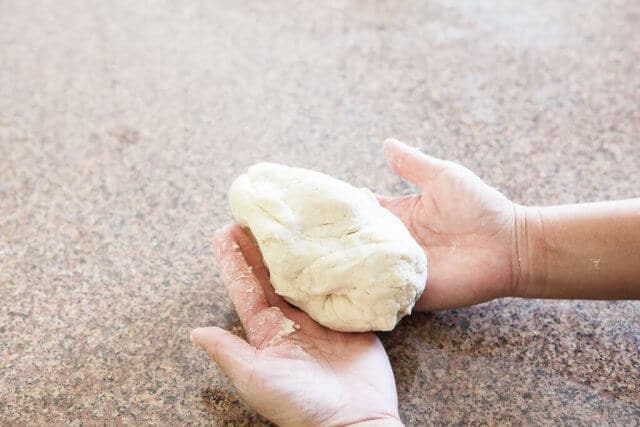
So keep kneading.
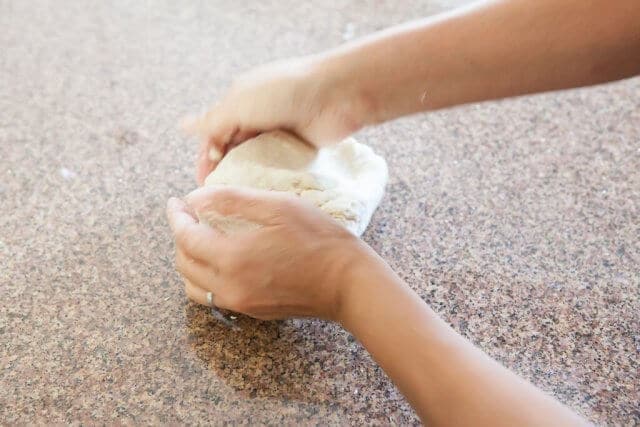
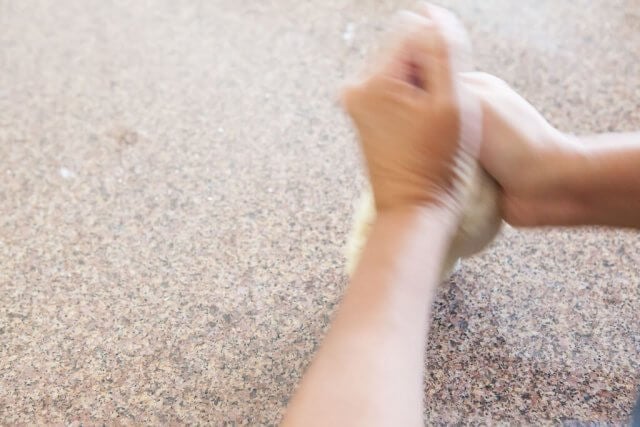
After 3-5 minutes of kneading, it should be ready. Smooth, stays round, firm yet gives slightly when poked and will ease back slooooowly.
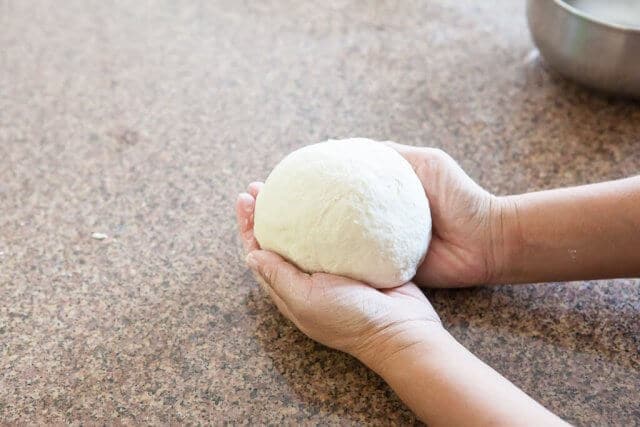
Place ball in a bowl.
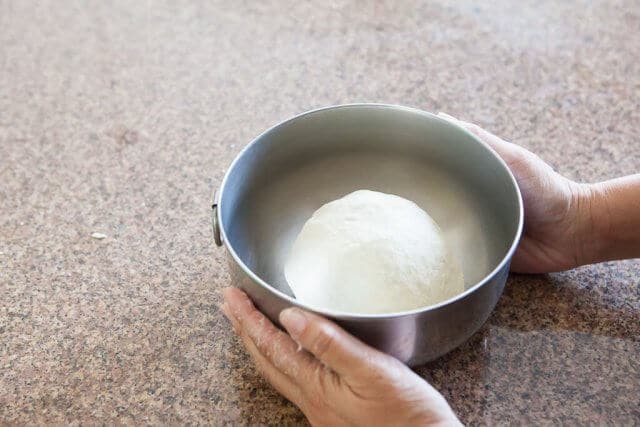
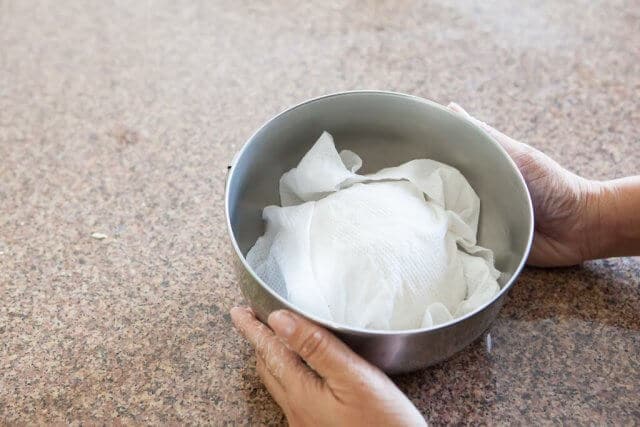
Cover with a barely damp paper towel (tip: this keeps the soft dough moist as it rests)
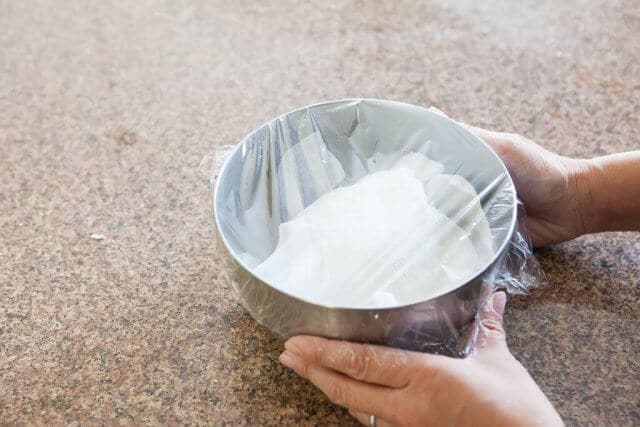
Cover with plastic wrap. Let rest for 20 minutes on the counter.
While the dough rests, we’ll make the potsticker filling.
How to Make the Potsticker Filling
You can use either regular green cabbage or Napa cabbage. Red cabbage will turn your potstickers pink (fun, if that’s what you want!)
Napa cabbage has higher water content (lots of water in the thick part of the leaves), and is milder tasting than regular cabbage. You can use either, I tend to choose regular cabbage, as it’s on sale more often.
Today, Mom had Napa cabbage in the refrigerator. You can finely chop/shred the cabbage in a food processor, use the large holes of a box grater, or chop by hand. The recipe doesn’t use much cabbage, I’d rather chop by hand than spend the time washing the food processor. For Napa cabbage, I much prefer chopping by hand. The thick, large, white section of the cabbage leaves (would you call these stems?) becomes very mushy in the food processor.
Finely chop the leafy portion of the cabbage first.
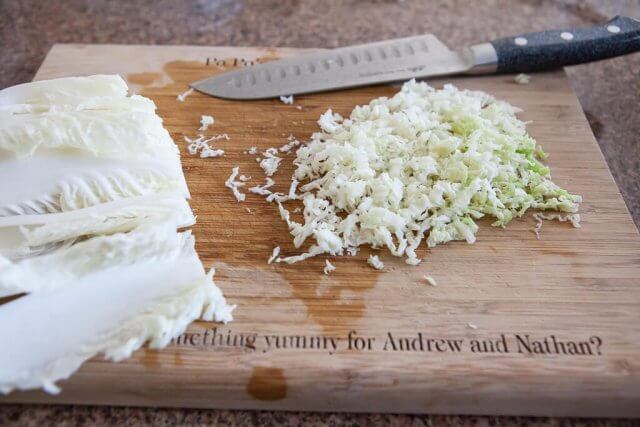
Then dice the thicker sections. (tip: I cut lengthwise into strips first, then dice)
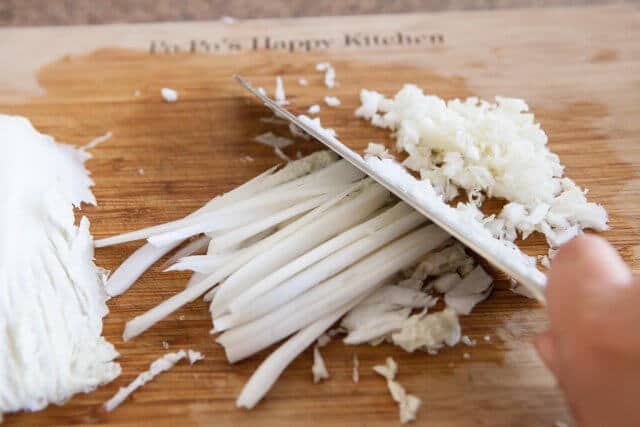
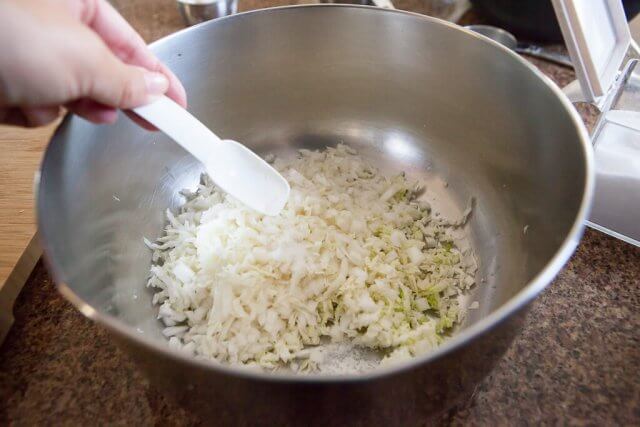
The next step is crucial to perfect potstickers – salt the cabbage to draw out the water. Cabbage contains a lot of water, and the cabbage releases the water when it cooks, which makes the potstickers soggy (and prevents crisp bottoms.) The salt will draw out the water, later we’ll squeeze the cabbage and discard the water.
Add a little salt to the cabbage. Give it a good stir and let sit for 7-10 minutes while you move forward with the rest of the recipe.
In a bowl, marinate the meat of your choice. (Hey, where did my photo of meat go? Sorry.) Stir together ground pork, soy sauce, ground white pepper (or black), cornstarch, sesame oil and a little cooking wine. Give it a good stir.
(Tip: In Chinese cooking, ground white pepper is used more often than ground black pepper. White pepper is a little spicier, sharper, more pungent. Already-ground white pepper goes bad really fast. Instead, my Mom puts whole white peppercorns in a pepper grinder that’s dedicated just for white pepper. Grind as you need for the best flavor.)
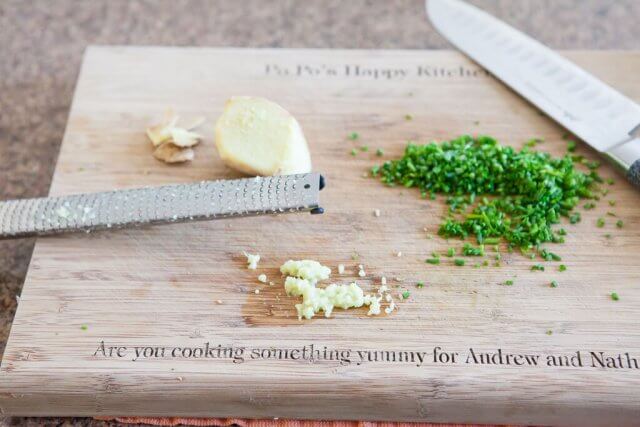
I’m also adding some freshly grated ginger (tip: peel the ginger, grate on a microplane grater instead of chopping by hand) and minced chives. You can use Chinese chives (strong in flavor, a little tougher), or just regular chives. Oh, that cutting board? I made that for my Mom (“Po Po” is Grandmother in Cantonese) It’s made from bamboo, and it’s such a neat gift. After 8 years of daily use, it’s finally warped too much and this was our last use before retiring. If you get one – a tip: Don’t engrave in the main area where you normally chop – difficult to clean, food particles can get stuck. I suggest only using engraved boards for vegetables and fruit. No raw meat.
Water chestnuts – I love fresh water chestnuts, but they are hard to find! Canned water chestnuts are used mainly for texture, not for the taste (it’s too mild in taste). Water chestnuts add a delicate crisp-crunch, like an Asian pear or Fuji apple. It’s wonderful in a dumpling.
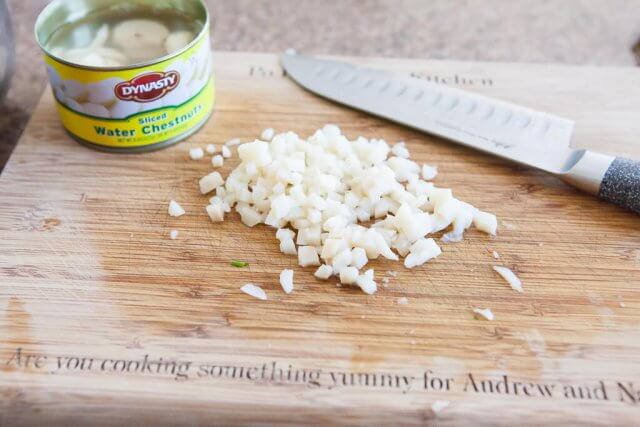
Other ingredients that I like to use in the dumplings: finely chopped fresh shiitake mushrooms or Chinese black mushrooms. Chinese black mushrooms are usually sold dried, they are thicker and heartier than Japanese shiitake mushrooms. You must soak in water to reconstitute these mushrooms before use. Soak in a bowlful of water for a few hours until soft enough to cut, discard the water, discard tough stem, dice the mushroom caps. (Tip: soak in hot water to cut soaking time in half; Microwave or boil for 3 minutes to further cut time. But it does take at least 1-2 hours of soaking, regardless, so plan early.)
Back to the cabbage!
Take a handful of the salted cabbage and squeeze hard to expel the water into a small bowl or in the sink. Of course, you can use a cheesecloth, but it’s faster and easier with your hands.
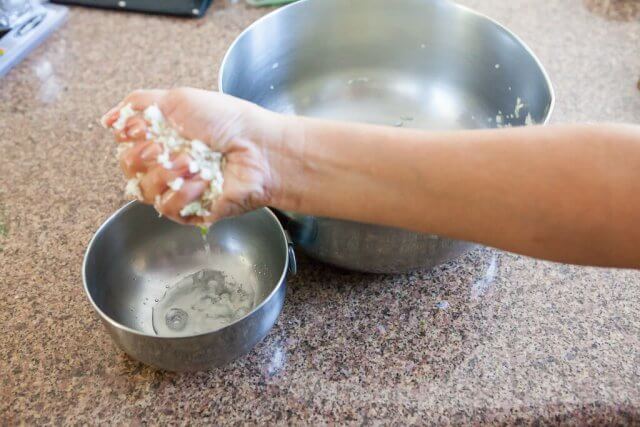
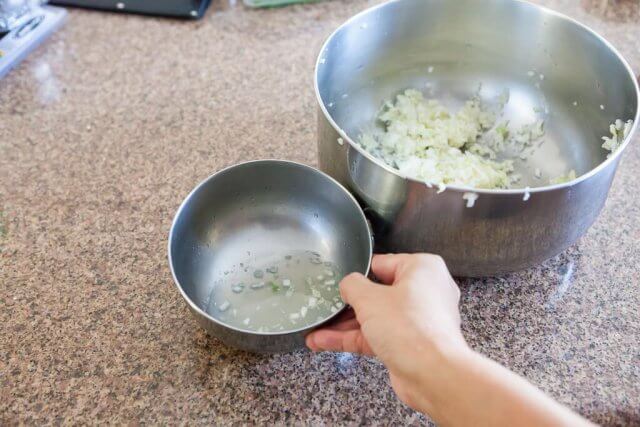
Look how much water came out of the cabbage! Discard the water. All of that water would have made the potstickers very soggy.
Put all of the filling ingredients into the bowl with the cabbage – ground meat, chives, ginger, mushrooms, water chestnut. Mix it up good. (Tip: instead of ground meat, you can use finely minced raw shrimp. I would caution against using expensive lobster in potstickers – you won’t be able to taste the lobster. Lobster is best used in steamed dumplings.)
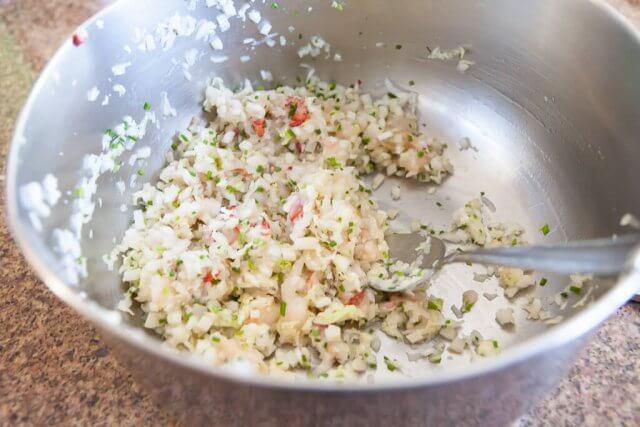
(Tip: Remember that the cabbage is already salty, so be careful of adding too much soy sauce or additional salt to the filling. Also, remember that potstickers are served with a dipping sauce too. I like to heat a small frying pan, add a drop of oil and fry a spoonful of the filling for a taste. I can always adjust the flavor – many times, I will add more grated ginger or a touch more soy sauce, if needed.)
How to Fold Perfect Potstickers
Hey, remember the dough? It’s been resting now, all relaxed and ready to go.
Turn out the dough onto lightly floured work surface. Don’t expect the dough to rise (there is no yeast), but it will be come more smooth, soft and elastic.
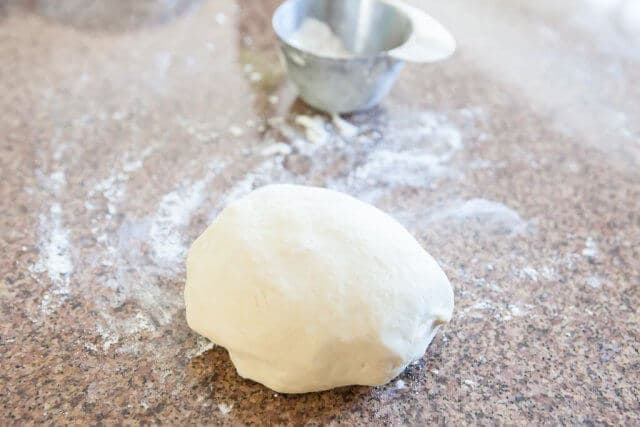
Divide the ball in half. Keep one half covered in the bowl, or under the damp paper towel while you work with the other half.
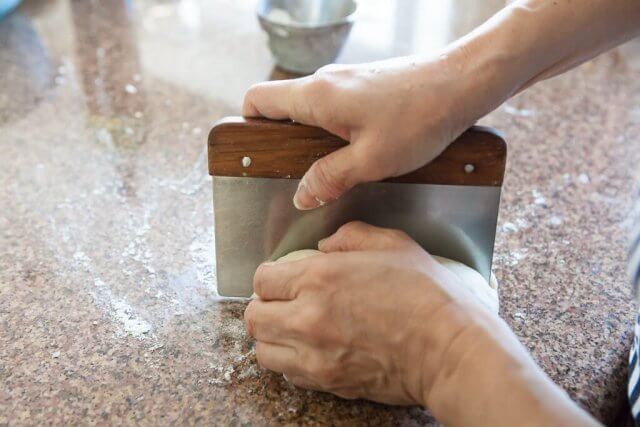
Roll out the dough half into a sausage shape.
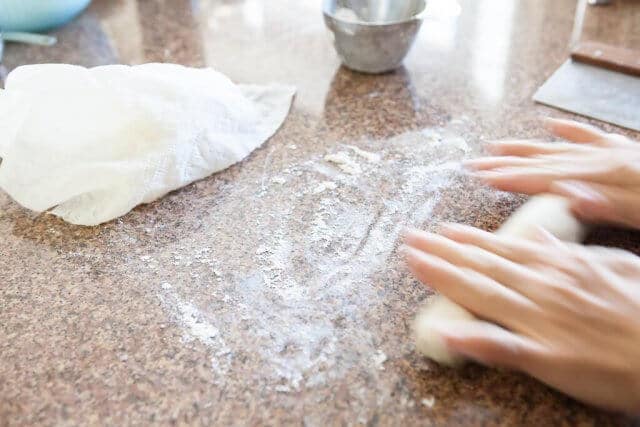
As you roll, move your hands wider apart to create a long snake, about 1-1/4 inches in diameter. (Tip: If you find this hard to do, you can cut the dough ball into quarters and work with a smaller piece. Another way to roll out to a long snake is to take a piece of dough, rub your hands together like you’re trying to start a fire with a stick. Use gravity to help elongate the snake.)
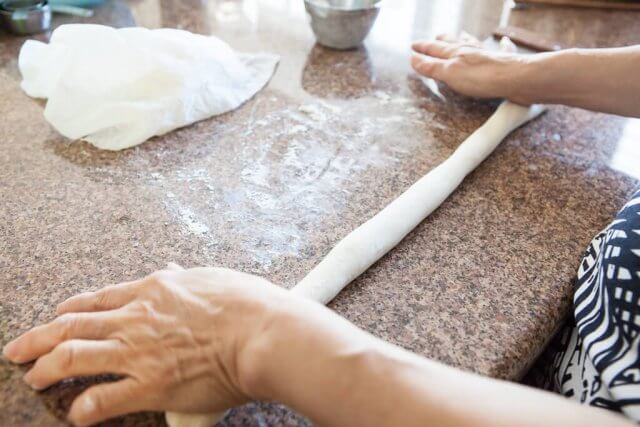
Now, it’s time to cut. You’ll be cutting this snake into 20 pieces (for a total of 40 pieces using both halves of the dough ball.)
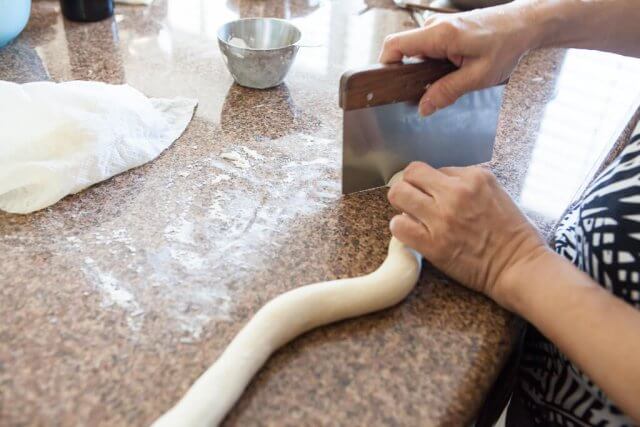
(Tip: with each cut, my Mom likes to roll the snake forward 1/4 turn. This creates pieces that are more uniform in size and easier to roll out into round dumpling wrappers. Cut, roll snake forward a bit, cut.)
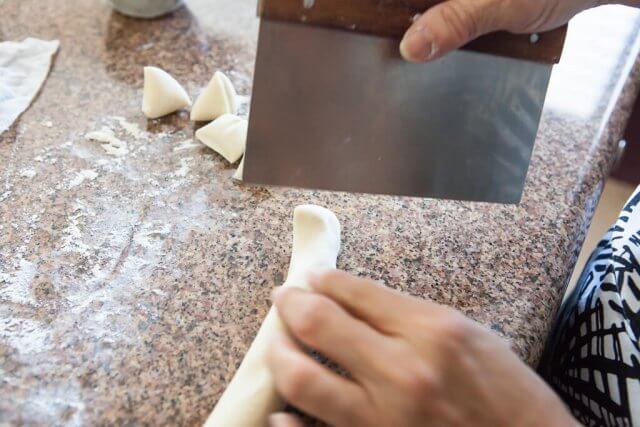
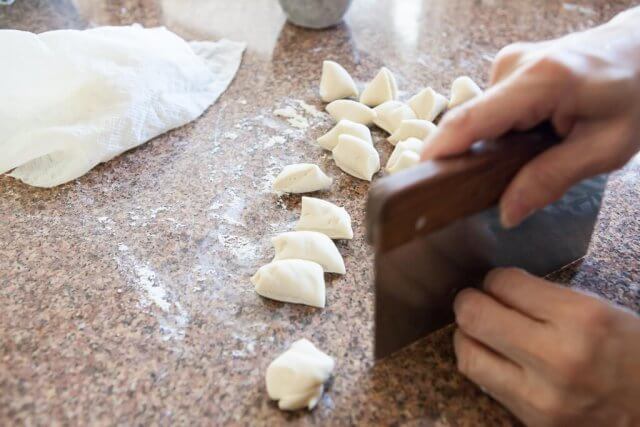
Once you’ve cut 20 pieces, it’s time to roll them out. Take one piece and pull up the edges of the dough and pinch together to create a tight, taut surface to begin. This will help create a evenly round ball.
Roll the piece in the palms of your hands to create a smooth, round ball.
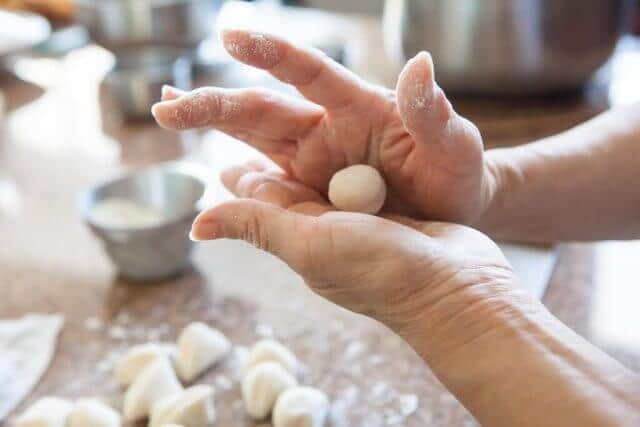
Smash the ball in between the palms of your hands to flatten the ball.

Just like this.
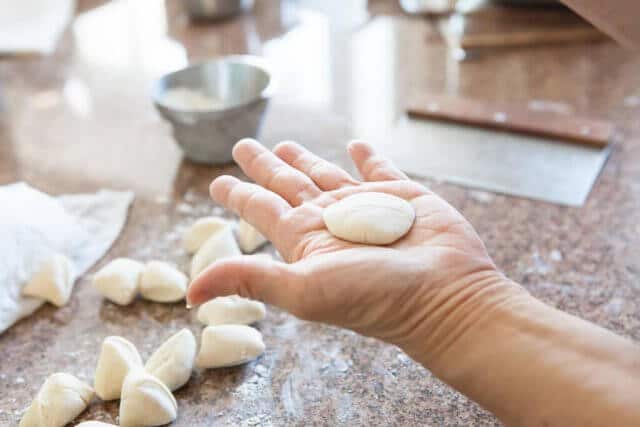
Use a small rolling pin to flatten. Chinese rolling pins for dim sum and dumplings are small in diameter (about 1 1/2 inches wide) and even in thickness – just like the end of a broomstick. In fact, I’ve known people who have cut the end of a new broomstick to use as a dumpling roller! Having a small, light rolling pin makes creating the wrappers so much easier and faster. You’ll be holding the dough with one hand, while you use the rolling pin with the other. No Chinese rolling pin? Just use whatever rolling pin you have, it just will take you a tad bit longer to make the wrappers.
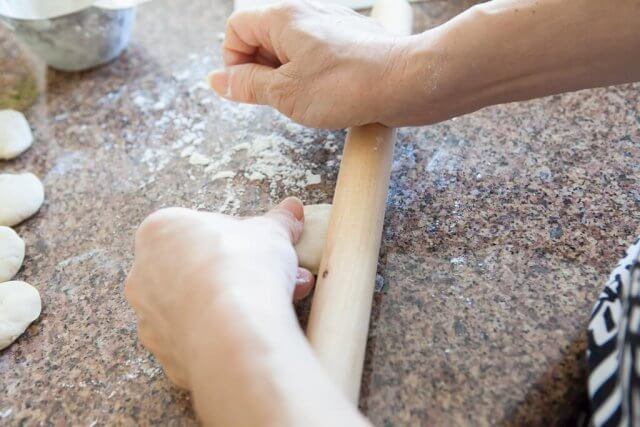
Once your wrapper is about 2-1/2 inches wide, it’s time to focus the rolling on the outside edges of the wrapper.
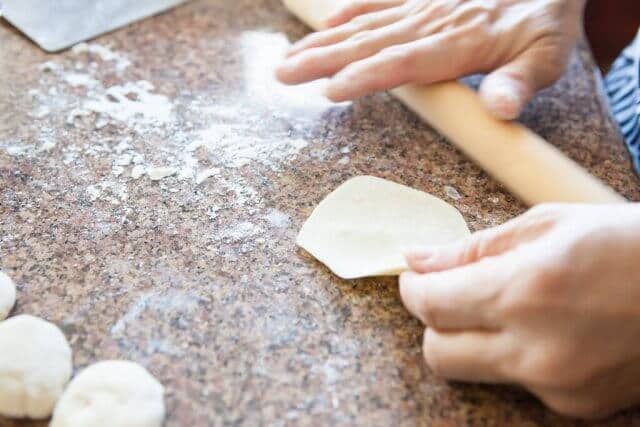
(Tip: Handmade potsticker wrappers are thinner on the outside and slightly thicker in the middle. This is because the edges of the wrapper will be pleated and pinched together when you are making the potsticker. If your outer edges are too thick, the pleats will be too thick – resulting in undercooked, chewy, doughy skins at the pleats.)
Your potsticker wrapper doesn’t have to be perfectly round. Round-ish is just fine. The wrapper should be about 3-1/4 to 3-1/2 inches in diameter.
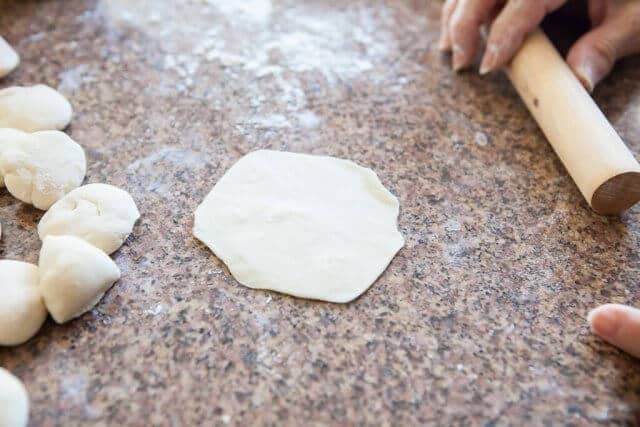
We’ll learn how to fold the potsticker dumplings.
How to Fold Potsticker Dumplings
When you are using store-bought wrappers, you need a little cornstarch slurry to act as the “glue” hold the the pleats together. But when you are making fresh wrappers by hand, there’s enough stickiness that no slurry is needed. (Tip: If using store bought wrappers – in a small bowl, whisk together 1/3 cup water + 1 teaspoon cornstarch. “Finger Paint” the outside edge of the wrapper with this slurry before folding the dumpling. This will hold the pleats together.)
The key to folding beautiful potstickers is to not put too much filling into each potsticker. Use a heaping teaspoon of filling for each dumpling.
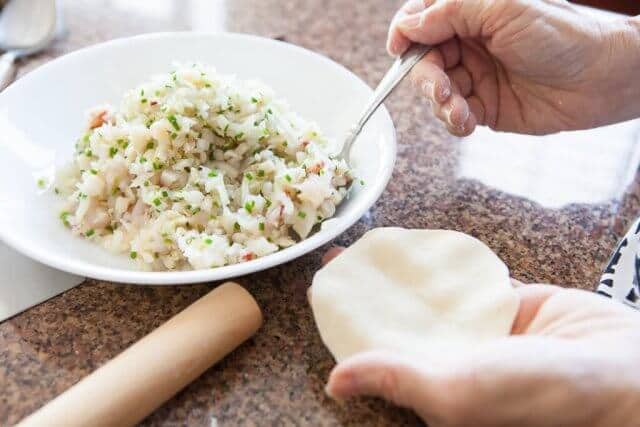
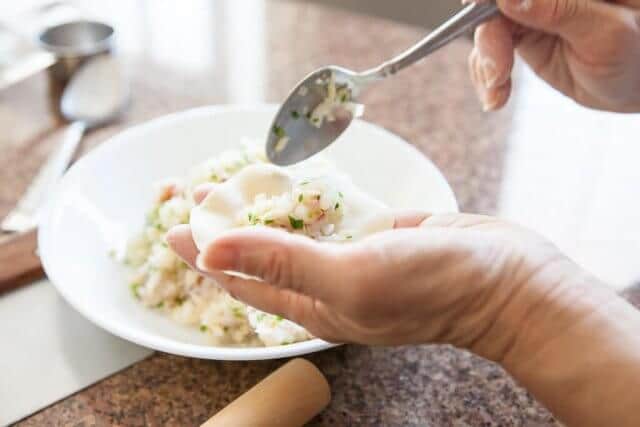
Place the filling in the middle of the wrapper and fold over.
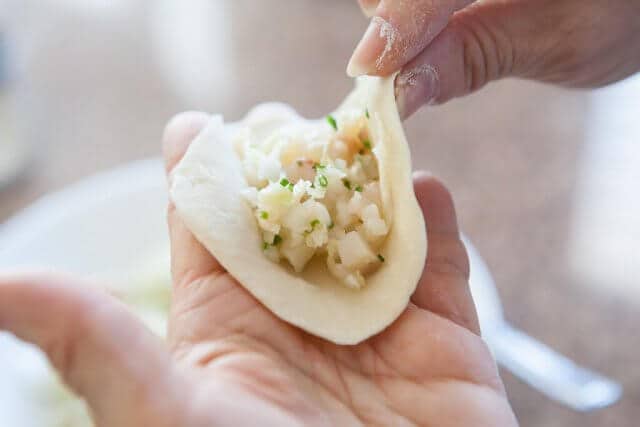
Pinch the middle. We’ll work one side at a time, pleating towards the center.
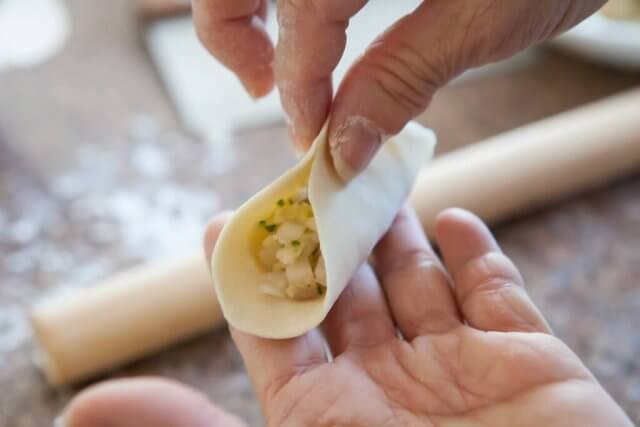
Mom like to work the right side first. Pleat just one side of the wrapper and fold TOWARDS the middle. This is what will make the crescent shape. Notice that you are only pleating ONE edge of the wrapper – or as my son likes to say, “Just pleat one side of the taco!”
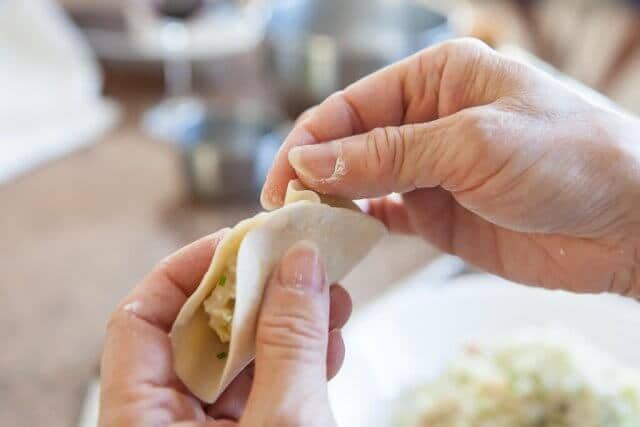
Do this 2 more times, for a total of 3 pleats on the right side.
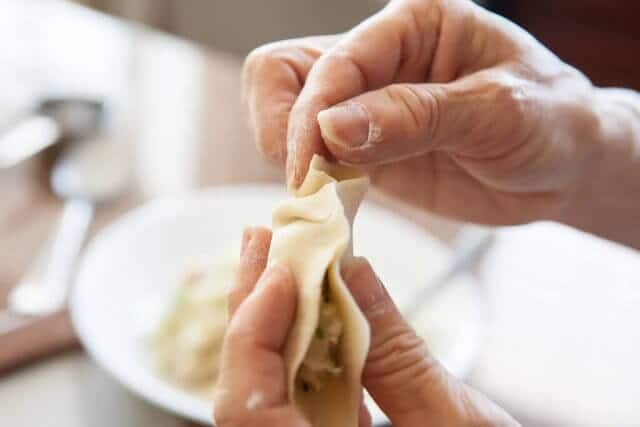
Now, we’ll do the same for the left side. Pleat towards the middle.
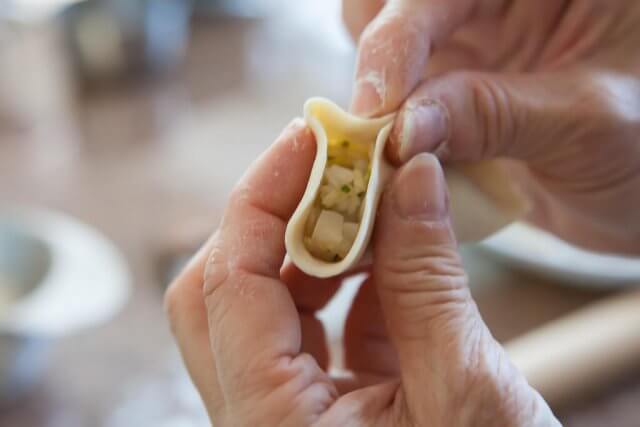
Repeat for a total of 3 pleats on the left side.
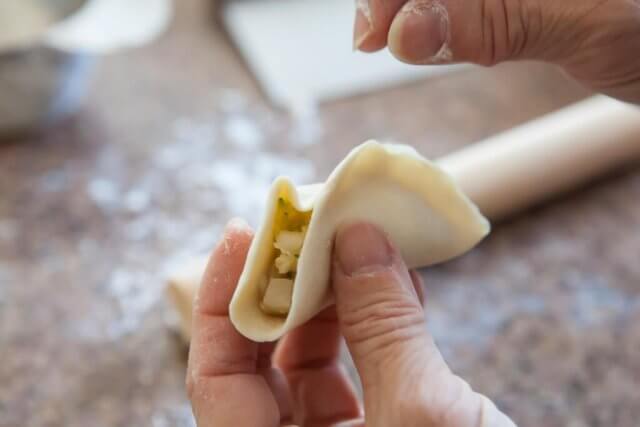
Little holes are bad. it causes the filling to spill out and the potsticker to break. If you can fit one more pleat to close the hole, feel free to make one more.
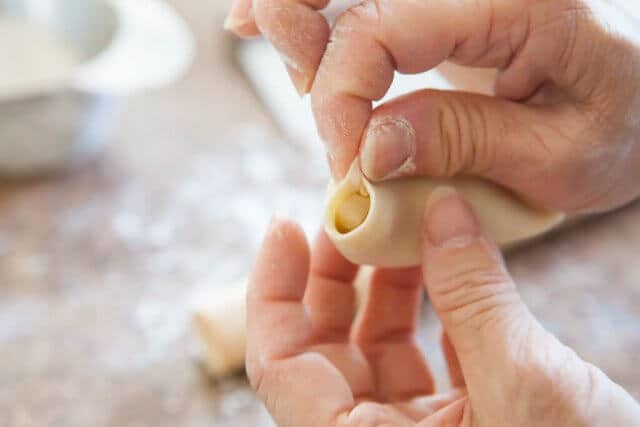
Or just squeeze it shut.
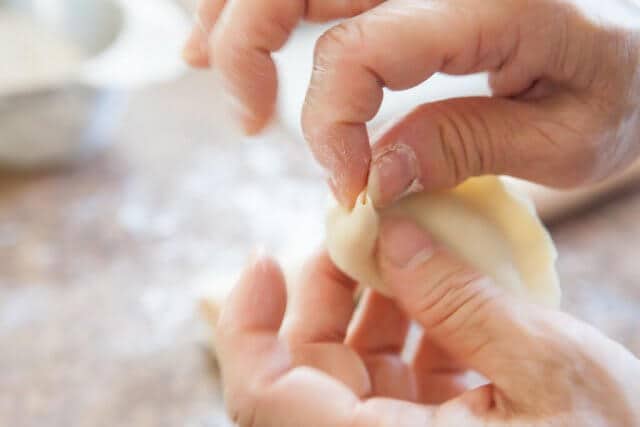
The last step is important – pinch all around one more time. Holes are bad. The pleats should be pinched tight.
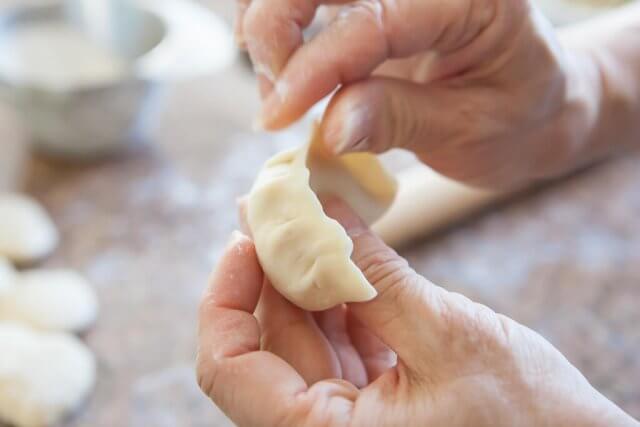
See? Bad hole! Pinch to seal.
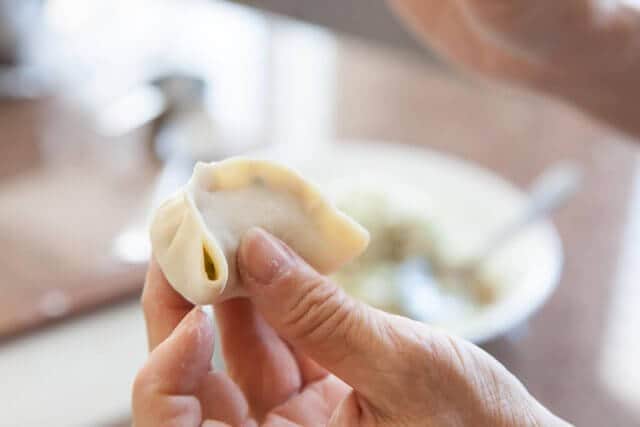
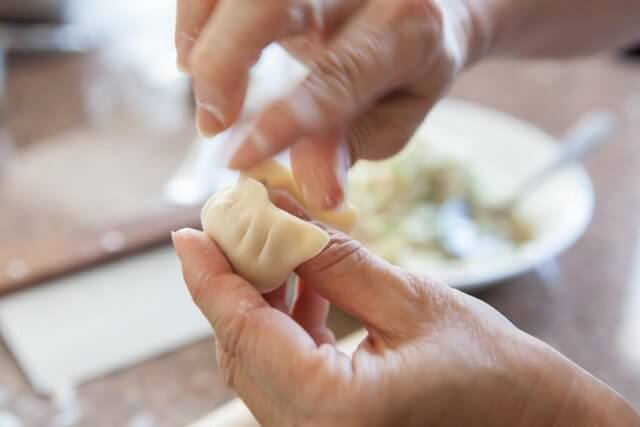
Place your potsticker on a baking sheet. (Tip – if you are not cooking the potstickers right away, you must line the baking sheet with a sheet of tin foil or parchment paper dusted with flour. Freshly made wrappers stick very easily. You’ll have a really hard time lifting the potstickers off a baking sheet if you’ve let it rest too long.)

Want a different angle?
Sometimes, it helps to see this in motion from a different angle. My brother took these photos over my shoulder. Literally, over my shoulder and included my shoulder in the shot.
Add a heaping teaspoon of filling in the middle.
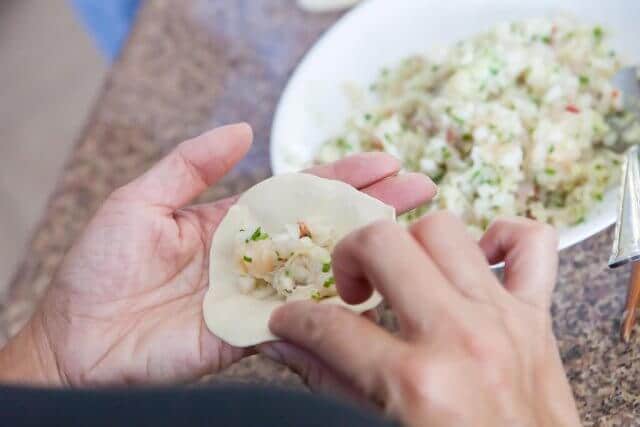
Pinch the middle tight.
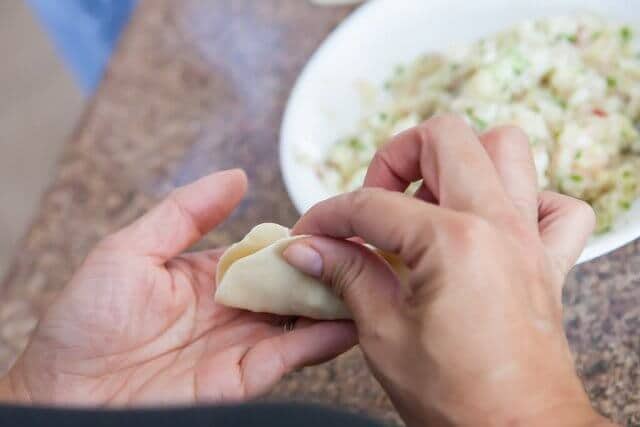
While my Mom likes to work the right hand side first, I prefer starting with the left. Not sure why! Either is fine. Pleat the outer edge towards the middle. Repeat 2 more times for a total of 3 pleats on this side.
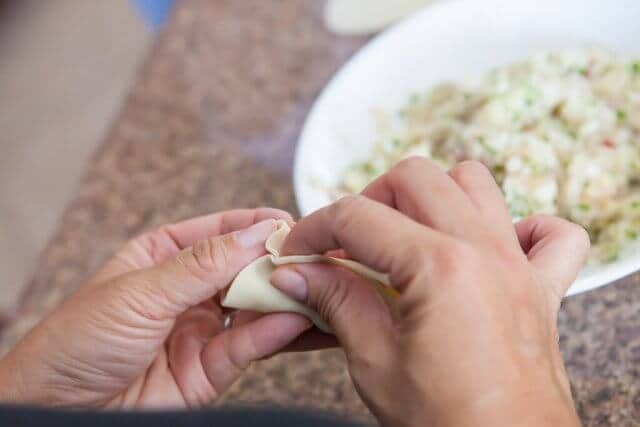
Now pleat the right side. Make 3 pleats towards the center.
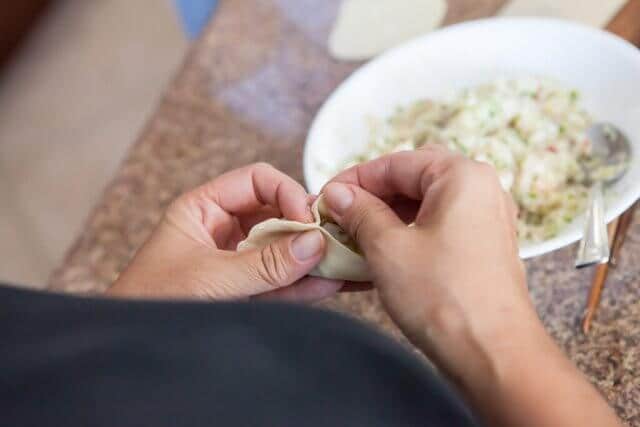
Final step, pinch the entire edge tight.
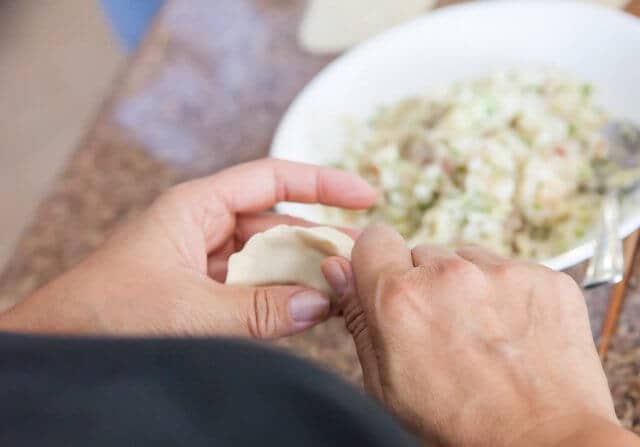
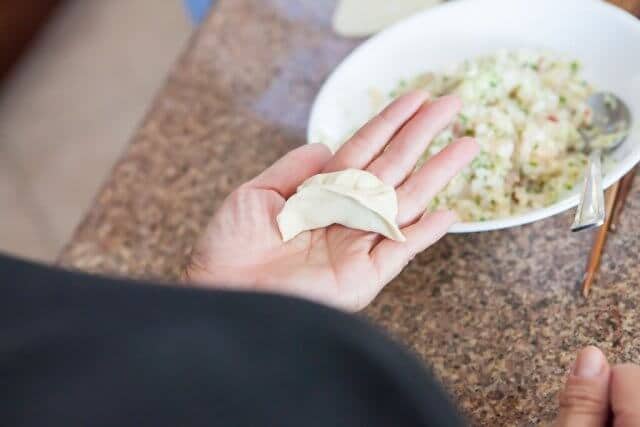
My Mom rolled out the wrappers, I folded dumplings. Notice the tin foil lined sheet with a good dusting of flour to prevent the potstickers from sticking. Make sure there’s plenty of place between each potsticker. If they touch each other on the baking sheet, they’ll stick to each other. Fresh dough is sticky.
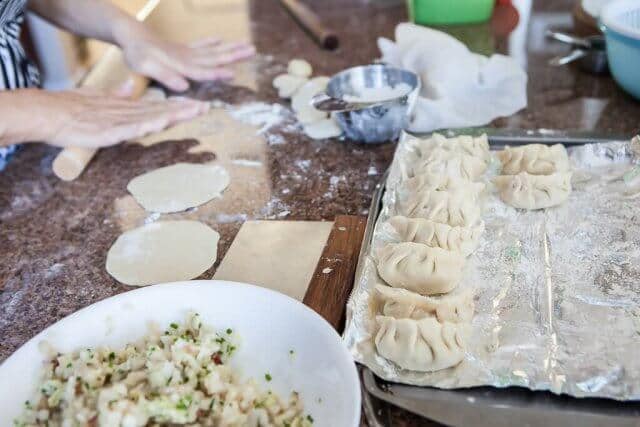
Next page, we’ll fry the dumplings.
How to Cook the Potstickers
Heat a nonstick frying pan (or saute pan) over medium heat. Swirl in a little cooking oil, not too much, just enough to swirl and coat the bottom of the pan. Once the oil starts to get hot, lay the potstickers in a single layer.
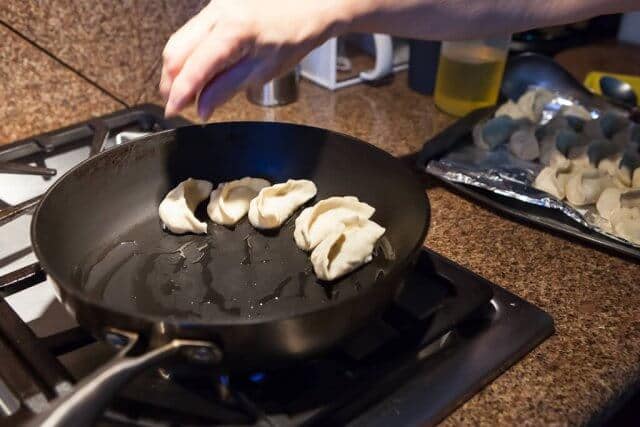
They can touch, but don’t overcrowd – the dumplings will expand as they cook and you want to give them plenty of space so that the bottoms can brown properly.
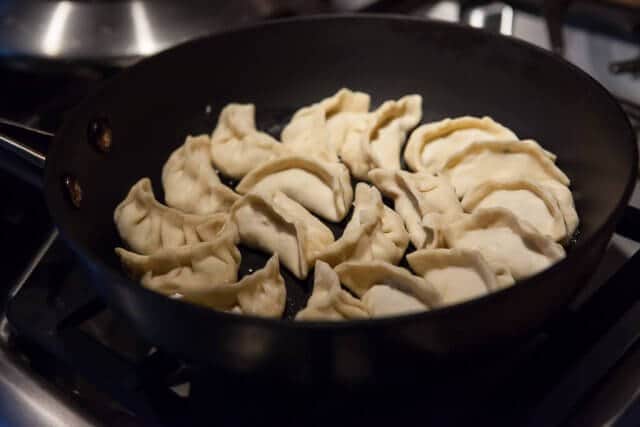
Let cook for 1-2 minutes. While they are browning, get 1/4 cup of water and the pan’s lid ready – you’ll need these at your side shortly. Peek underneath a dumpling to give it a look. Not brown yet. Cook a little longer!
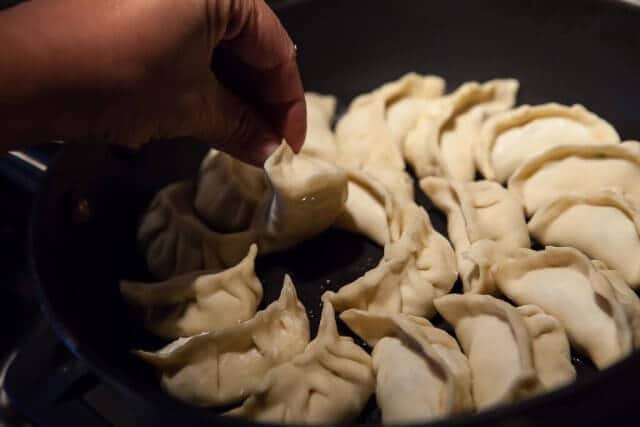
This is good.
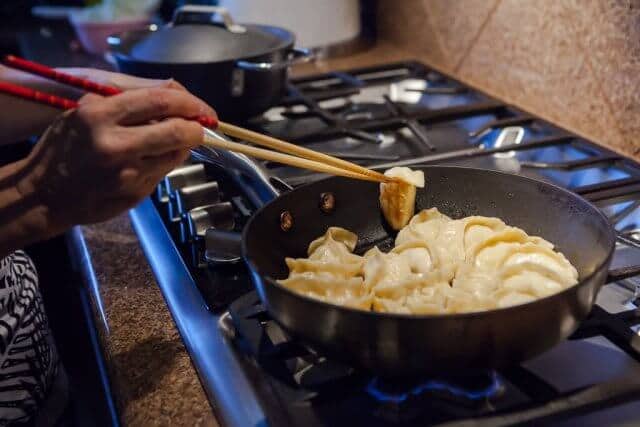
Check a couple of different dumpling bottoms – sometimes your pan can cook unevenly. When the bottoms are browned, grab your 1/4 cup of water in one hand, and the lid in the other. Carefully and slowly pour in the water (it might splatter a bit) and immediately cover with the lid to trap the steam.

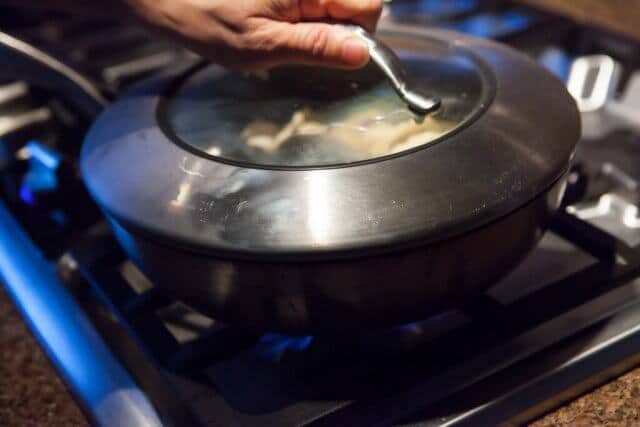
Let cook for 2 minutes. Then, open the lid. There should be lots of water bubbles as the water heats up and steams. The steam cooks the dumplings on the inside. Keep the lid off and let the water continue to cook and evaporate.
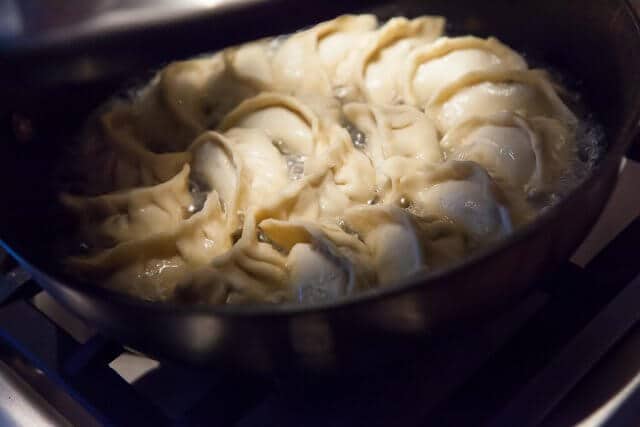
(Tip: While the dumplings brown in the first step, frying in the pan, the most important browning actually happens as the water evaporates. When almost all of the water is gone, the extra starch from the dumpling wrappers will begin browning again and really give good crust on the bottoms of the potstickers.)
Cook, uncovered, until all water has evaporated and the bottoms are now crisp and browned.
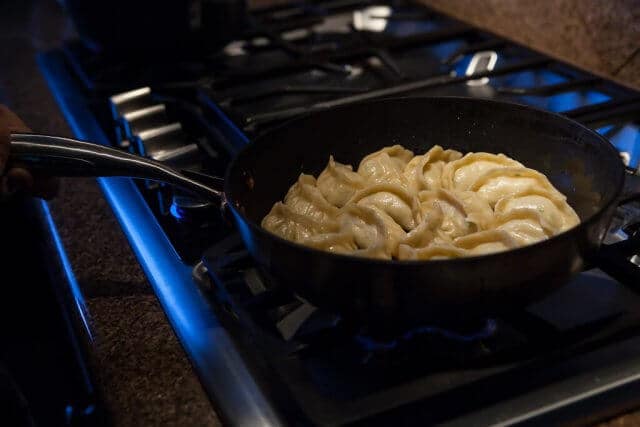
Like this.
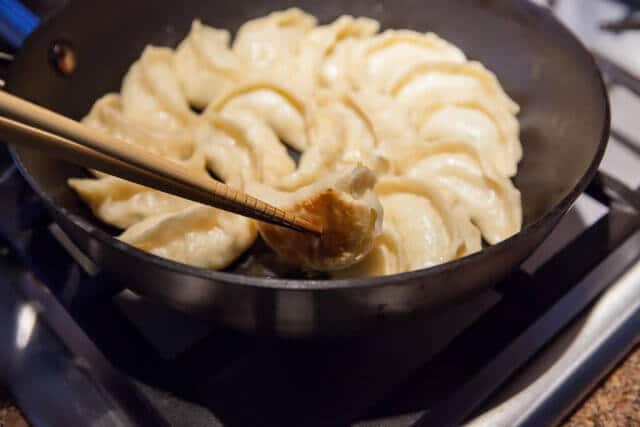
(Tip: If you find that the bottoms aren’t browning well enough, you can dribble in a little more cooking oil. Shake the pan back and forth to let the oil reach the bottoms of the potstickers, and to loosen the the potstickers from the pan.)
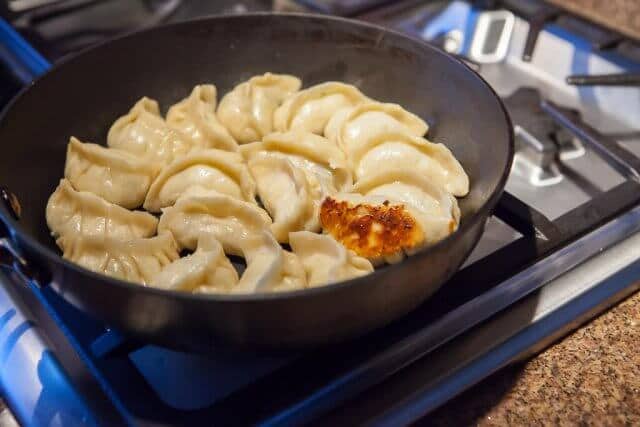
(Tip: I highly recommend a non-stick pan. Unless your pan is really well seasoned, it’s very difficult to prevent the potstickers from sticking. You can use a cast iron pan if you wish, but because the cast iron retains heat so well, I’ve had problems with controlling the heat (and burning/overcooking the potstickers.)
Repeat with the remaining potstickers. In between batches, just wipe down the pan with a paper towel – there’s no need to wash the pan – but make sure there’s no water in the pan.
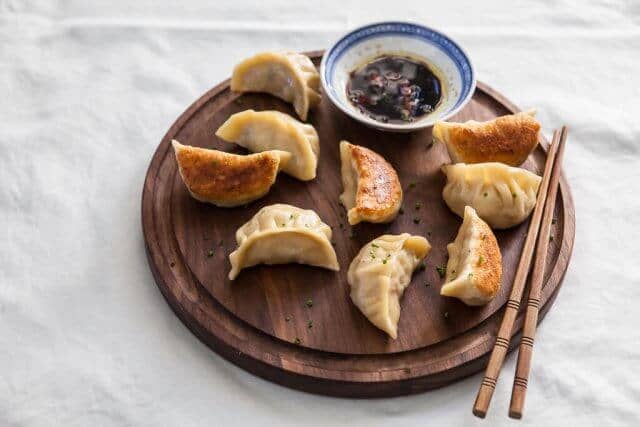
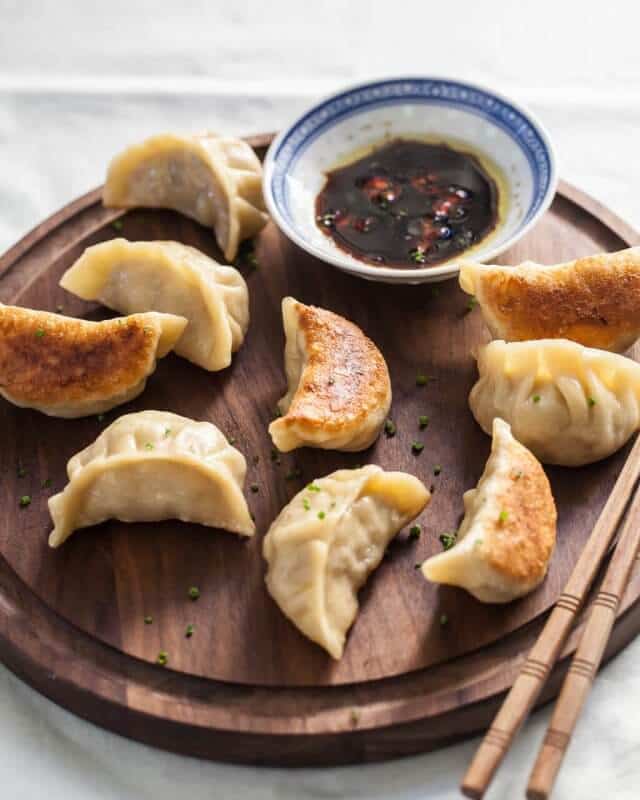
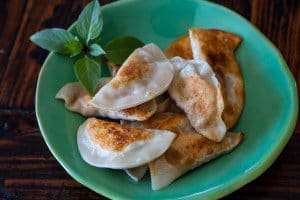
Perfectly pleated, beautifully cooked potstickers with a crisp bottom that stays crispy!

The dipping sauce – there are so many options!
My Dad loves Chinese black vinegar with soy sauce, slivers of fresh ginger and a little sesame oil. My kids like soy sauce, a little sugar, sesame oil. My husband loves Thai sweet chili sauce, straight from the bottle (I like Mae Ploy brand or Trader Joe’s brand – I’ve linked to Amazon so you can see what they look like but their prices are outrageous. Just go to your supermarket and get Sweet Chili Sauce). My brother loves spicy – we add chopped fresh hot chili peppers or a dollop of Chinese garlic-chili sauce or a squirt of sriracha.
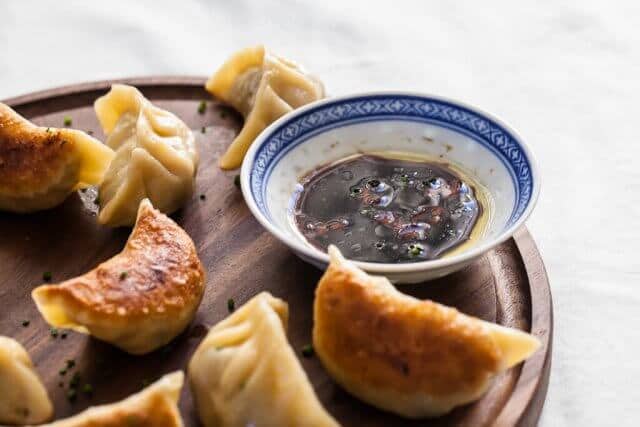
Dad’s Chinese Black Vinegar Sauce
Dad likes to use a mixture of Chinese black vinegar, soy sauce and the thinnest slivers of fresh ginger. The most famous Chinese black vinegar is Chinkiang Black Vinegar, though Koon Chun brand is easier to find and will do just fine. What works just as well (and I often use) is cheap balsamic vinegar. Not the expensive, thick, sweet kind (save that for the strawberries!), but just regular ol’ supermarket balsamic vinegar.
Why black vinegar? It’s aged vinegar, so it provides an earthy, smoky, mellow zip and tang that goes well with Chinese dumplings and egg rolls.
Fresh ginger
2 tablespoons Chinese Chinkiang black vinegar
1 tablespoon soy sauce
1/2 teaspoon Asian sesame oil
Peel the ginger skin off and discard. Use a vegetable peeler and peel thin slices of ginger. Use a chef’s knife to further cut these thin slices into slivers. You’ll need about a teaspoons worth of ginger. In a small dipping bowl, mix together the black vinegar, sesame oil and ginger. To enjoy, dip your potsticker into the sauce. Use your chopsticks to pick up a few slivers of ginger and eat together with your potsticker.
Potsticker Dipping Sauce
2 tablespoons soy sauce
2 teaspoons rice vinegar (sub with cider vinegar, white vinegar)
1/2 teaspoon sugar
1 small clove garlic, very finely minced
minced fresh chili peppers (optional)
1/2 teaspoon Asian sesame oil

Best Potsticker Dumpling Recipe
Ingredients:
FOR THE WRAPPERS
2 1/2 cups all-purpose flour
1/4 teaspoon salt
2/3 cup just-boiled hot water
1/3 cup iced cold water FOR THE FILLING
8 ounces minced or finely shredded cabbage (Napa or regular)
8 ounces ground pork (ground meat of your choice)
1/2 teaspoon soy sauce
freshly ground white pepper (or black)
1/2 teaspoon cornstarch
1/2 teaspoon Chinese rice wine (optional)
1/2 teaspoon Asian sesame oil
2 tablespoons minced chives (Chinese or regular)
4 ounces diced water chestnuts (canned is fine)
3-4 large fresh shiitake mushrooms, finely diced
1/2 teaspoon grated fresh ginger
Directions:
PREPARE THE WRAPPER DOUGH:
To a large bowl, measure in the flour and the salt. Pour in the boiled water and stir the flour immediately and vigorously with a large wooden spoon until the flour resembles loose crumbles (about 30 seconds). Pour in the iced-cold water (discard the ice first, but make sure you have correct measurement of water). Stir vigorously again for 30 seconds or until a shaggy dough begins to form. Set aside spoon and use your hands to knead the dough in the bowl, while picking up flour/dough on the sides of the bowl. Knead for 2 minutes in the bowl. Turn out the dough onto a clean work surface. No need to dust the work surface with flour – unless the dough really sticks). The dough should be soft and elastic enough that kneading is very easy. Continue to knead your dough for another 3-5 minutes. As you knead the dough, it should become more smooth. In a medium sized bowl, plop in the dough ball, cover dough loosely with a barely damp paper towel and then cover bowl tightly with plastic wrap. Let rest for 20 minutes while you prepare the filling.PREPARE THE FILLING
In a bowl, mix the shredded cabbage with 1/4 teaspoon of salt (1/2 teaspoon kosher or sea salt, if using.) Set aside while you move on to next step of recipe.In a separate bowl, mix the ground pork with soy sauce, ground pepper, cornstarch, rice wine (if using) and sesame oil. Add in the chives, water chestnuts and mushrooms.
Back to the cabbage – grab a handful of cabbage, squeeze hard to expel the water into the sink. Add the dry cabbage into the bowl with the rest of the filling ingredients. Mix well. You can cook a spoonful of filling in a small frying pan for a taste, if you’d like.
PREPARE THE WRAPPER
Turn out the rested dough onto a lightly floured surface. Cut the dough in half, keep unused half under the damp paper towel to prevent from drying out. Roll out the other half into a long snake, about 1-1/4 inches in diameter. Cut into approximately 20 even pieces. Take 1 piece, gather up the edges and pinch together, forming a taut, round surface. Roll between palms to form ball. Squash between flat palms to flatten into disk. Use rolling pin to roll out to 3-1/2 inch diameter. Try to make the edges of wrapper thinner than the center. Repeat for remaining dough. If you don’t have a helper on hand to fold the potstickers, keep wrappers under cover (plastic wrap or barely damp paper towel) to prevent drying out. Fill and fold potstickers according to the instructions and photos above in the post. Place folded potstickers on a floured piece of parchment or tin foil-lined baking sheet to prevent sticking.COOK THE POTSTICKERS
Have 1/4 cup water and a tight-fitting lid for your pan at the ready, by your stove. Heat a large, nonstick frying or saute pan over medium heat. When hot, swirl in a little cooking oil, just enough to swirl around. Carefully lay potstickers into the pan, they can touch a little, but do not overcrowd. Cook for 1-2 minutes, then peek under one or two potstickers to see if the bottoms have lightly browned. Adjust your heat if needed.When lightly browned, it’s time for the steaming. In one hand, have the lid ready. In the other, carefully pour in 1/4 cup of water into the pan. It will splatter, so please be careful. Immediately cover pan with the lid to trap the steam. Let cook for 2 minutes, then open the lid. Continue cooking for another 2 minutes, until all of the water has evaporated. Take a peek under the potsticker. You can add a little more cooking oil if it has trouble browning (but only after all the water has evaporated, otherwise it will splatter.) Shake the pan to loosen the potstickers, swirl in the oil and tilt pan to distribute the oil. When bottoms are nicely browned, plate and serve with dipping sauces (dipping sauce ideas and recipes are in the post.)
Thank you for your support of Steamy Kitchen!
More Potsticker Recipes
Pork and Shrimp Potsticker Recipe
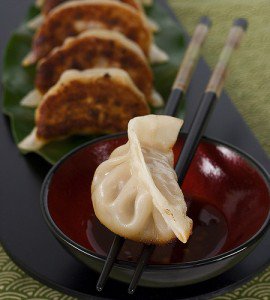
Mushroom Tofu Potsticker Recipe
Source: http://steamykitchen.com/41178-best-chinese-potsticker-dumplings-recipe.html