From time to time when someone learns that I’m married to a Russian, they’ll ask me if I can come up with a recipe for a Russian dish they’ve had, which is hilarious because I have never been to Russia, have probably only picked up 20 words (by generous estimation) in the 13 years we’ve been together and of the maybe five Russian dishes I’ve made, I’ve simply done them my mother in-law’s way. It’s almost like people might know that I have a tendency to get really obsessive when I decide I want to crack the code of a recipe and they’re hoping I’ll apply it to a long-lost loved dish they want to make a regular part of their lives again? Nah, that would be ridiculous.
Enter: medovik. Or maybe smetannik. Guys, if you’re ever looking for a sign that a recipe is going to be a doozy to unpack, definitely aim for a dish that nobody even agrees on the name of.*
Technically speaking, this hunt began in 2013 when I received two requests for Russian honey cake — something I’d never even heard of — within a month. I expected it to be a fairly simple process: 1. Try an authentic one from a Russian bakery and see if I even liked it, which I doubted I would because I’m just not that into honey. 2. If I did, try to recreate it using published recipes as guidance. But things got immediately, screechingly off track.
First, I fell in love. Why did nobody tell me it was as stunning as a dobos torte? I have a soft spot for cakes with a gazillion skinny layers. Oh, and the flavor — I had no idea. It tastes like an extraordinarily good honey graham cracker (i.e. like nothing we can buy in a box) that’s at once caramel and penuche and biscoff or stroopwafel layered with a sweetened cream or custard or cream cheese, yet the version I was eating, as per the ingredients on the label, contained exactly zero of these things. I was riveted.
And then I fell in… something, because the recipes I found made no sense at all. They were for cookies! This was unquestionably a cake with plush layers. I ceased all medovik/smetannik studies until this madness stopped.
Last month, three years later, I began anew. I went into a tornado of research — my Russian cookbooks, recipe websites in English and Russian via Google Translate, more Russian cookbooks through Google Book Search, having my mother-in-law call her friends that bake, YouTube videos in English and Russian — the likes I haven’t done since 2012’s Lasagna Bolognese in 2012, a dish I referred to “my culinary Mount Everest,” a mountain that has never since looked so tiny. The more I read, the more confused I became.**
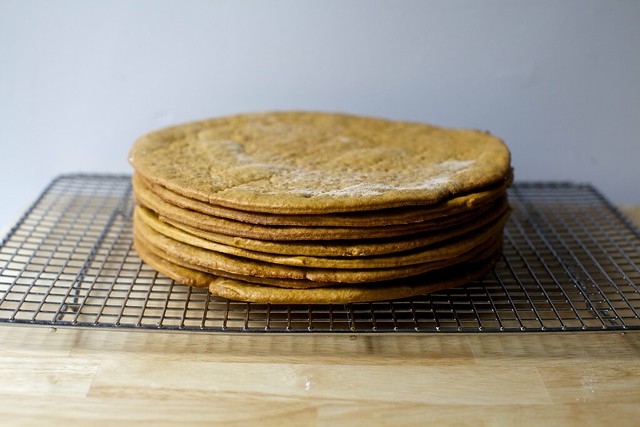
I finally, weeks later, had to make all the noise stop. I closed all the books and all of the browser windows and started typing a recipe that blended the most appealing middle ground or elements of everything I’d read. I accepted that there were parts that didn’t make sense to me but I would do them anyway. I expected very little, but the cookie discs — yes, cookies, but a tiny bit bendy so maybe 10 percent on its way to cake already — smelled like a kiss of buttery honey caramel as they exited the oven and I felt like we might be at the brink of honey cake greatness at last.
After expending so much mental energy on the layers, I decided the simplest filling option — sweetened sour cream — was the most sane place to start. Honey would be the logical thing to sweeten it with, but after seeing a few recipes that worked in sweetened condensed milk, only one of the most delicious substances on this earth, I sweetened mine instead with it. The filling/frosting takes approximately one minute to make and I was pretty excited by now because this was happening, I was finally doing this. And then this happened:
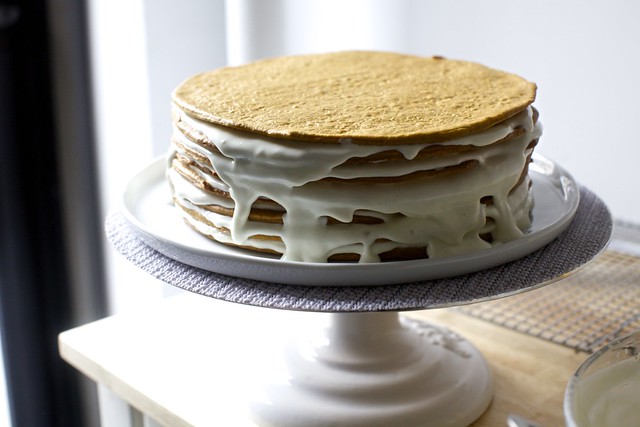
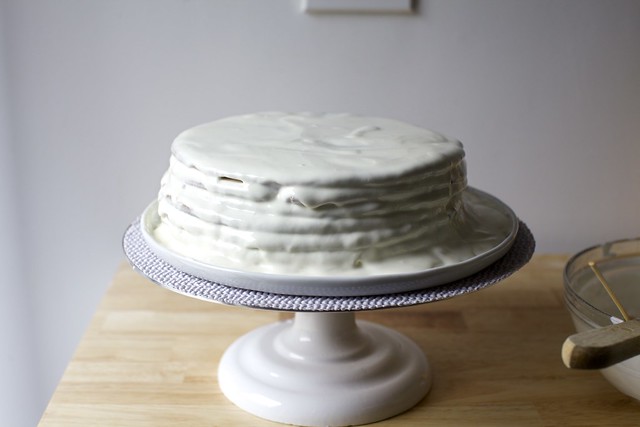
And I was all because I couldn’t believe I’d gotten so close just to trash the whole thing. I shoved it into the back of the fridge, stormed out of the kitchen and didn’t return until the next day, and then I took deep breaths. I re-iced the cake with the spillover. I scooped and spackled. I covered the cake with the prescribed crumbs but until the moment that we sliced into the cake, I was still convinced it was a flop, that there would be no filling left, just a merged megastack of cake inside with no nuance, no joy, no point, no…
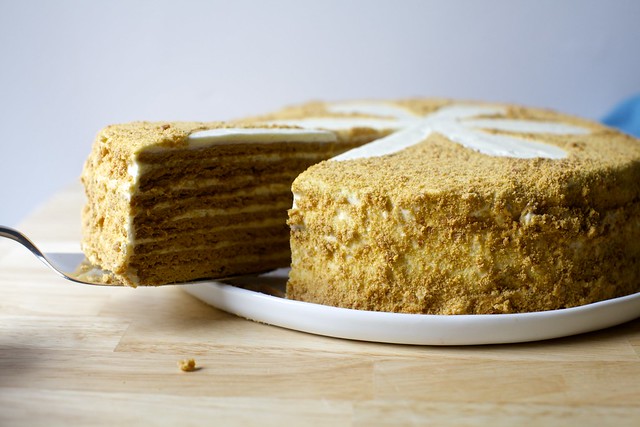
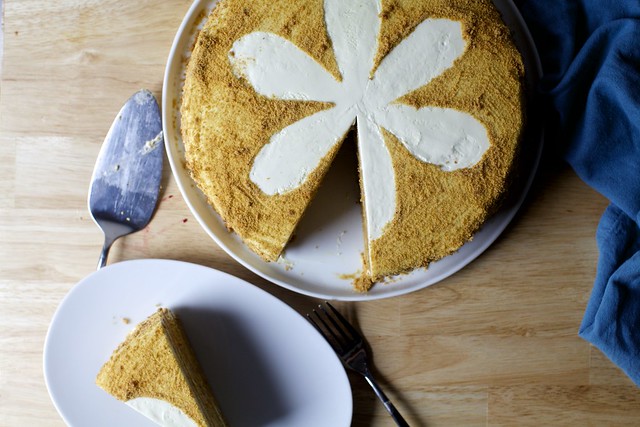
… sound. This cake has a way of silencing a room.
** So, is it called medovik (honey cake) or smetannik (sour cream cake), Deb? I asked many many people and here is a small sampling of the responses I got:
Team Smetannik: “Smetannik is what you made — it is a honey cake with sour cream layers…” “Smetanik is any cake with sour cream based frosting. Smetannik has honey in the recipe too, but only a little.” “Smetanik is a cake with sour cream used both in frosting and batter.” “smetannik, but you are missing the walnuts.. We make it with walnuts on each layer.”
“Medovnik, which I I think is also called Medoviy Tort — is basically the same thing, except, and this is where you get LOTS of debate, has honey in the sour cream frosting.” “Medovik is a honey cake which is usually assumed to have a sour cream frosting (though not always). I’d call it a Medovik.” “did you use multiple cups of honey in the recipe? Then it’s a medovik… also you seem to be missing walnuts”
Both teams were kind, however. “… if you were to use the terms interchangeably, the Russian culinary police won’t come after you, partly because there is no consensus.” “It’s definitely confusing, but call it what you want, I’d eat your version and ask for seconds.” (Aw.)
** Just a rough overview of some of my questions:
– Why did most contain 2 tablespoons of honey and 1 cup of sugar? How was this a honey cake?
– Why do some use 2 tablespoons of butter and others use 12?
– Half the recipes called for us to make a caramel and then, when it is still bubbling on the stove, whisk eggs into it — you do not need to be a food scientist to know this is how to make scrambled eggs. The other half have you make the caramel with the eggs already in it! How can that work?
– A lot of recipes have you mix baking soda and vinegar — basically activating it and rendering it almost inert, right? we did this once for red velvet cake and it confused me then too — and then mix in into the bubbling caramel, surely killing off any rising powers left in it. What was the point of all of this?
– Why does the dough roll out better when warm? Isn’t this stressful? What if your kid needs something and then the dough cools and you can’t roll it, does one just throw everything away?
– Do these really bake into cookies or something softer?
– And the filling — some people use sweetened sour cream, others add whipped cream and/or sweetened condensed milk or a full pastry cream/custard and I even saw one with a cooked flour frosting. Which was correct? Which was better? This is not America’s Test Kitchen. If I can not reasonably nail down a recipe in 2 to 3 rounds, I’m out.
Previously
One year ago: My Old-School Baked Ziti
Two years ago: Better Chicken Pot Pies
Three years ago: Miso Sweet Potato and Broccoli Bowl
Four years ago: Pumpkin Cinnamon Rolls
Five years ago: Apple Pie Cookies
Six years ago: Mushroom Lasagna
Seven years ago: Quiche Lorraine
Eight years ago: Best Challah (Egg Bread), Mom’s Apple Cake and Beef, Leek and Barley Soup
Nine years ago: Peanut Butter Brownies and Arroz Con Pollo
Ten! years ago: Lemony Persnick
And for the other side of the world:
Six Months Ago: Caramelized Brown Sugar Oranges With Yogurt and Potato Pizza, Even Better
1.5 Years Ago: Why You Should Always Toast Your Nuts and Obsessively Good Avocado-Cucumber Salad
2.5 Years Ago: Asparagus-Stuffed Eggs
3.5 Years Ago: Spinach and Smashed Egg Toast
4.5 Years Ago: Over-The-Top Mushroom Quiche
Russian Honey Cake
Planning ahead: You must start this cake a day early because you’re going to want the better part of the day for the filling to soften the cookies into glorious thin cake layers, just like an icebox cake. You can start even earlier than that, too. Our cake looked amazing in the fridge for 5 whole days before, um, it was “gone” so you can assemble this a few days before you need it. Or, you can make the cookie layers a week or longer in advance and store the in a container at room temperature, as you would other cookies. Just make sure you get them filled and frosted a day before you want to slice in.
-
Cookie Layers
- 1/2 cup (170 grams) honey
- 1/2 cup (100 grams) sugar
- 1/2 cup (115 grams) unsalted butter
- 1 teaspoon baking soda
- 3 large eggs
- 1/4 teaspoon fine sea or table salt
- 1 teaspoon (5 ml) vanilla extract
- 3 1/2 cups (455 grams) all-purpose flour, divided
-
Frosting and Filling
- 32 ounces (just shy of 4 cups or 900 grams) sour cream
- 1 14-ounce can (400 grams) sweetened condensed milk
- The day before, get ready: Heat oven to 350 degrees F. Get 2 baking sheets (or even better, round pizza pans) down, more if you have them. Tear off 6 sheets of parchment paper large enough to have a 9-inch circle on it.
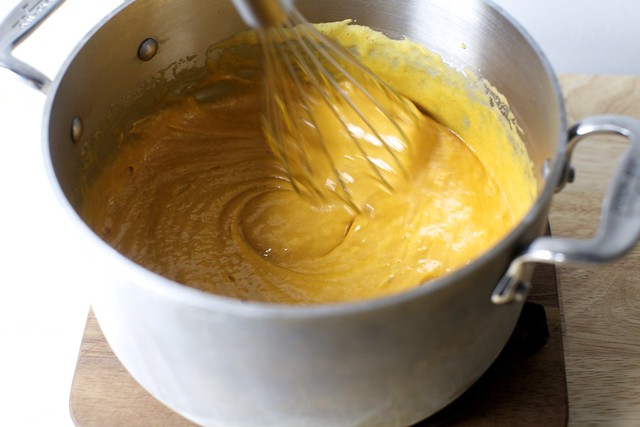
Make cookie/cake dough: In a medium-sized saucepan, combine the sugar, honey and butter over medium heat. Once simmering, cook for 3 to 4 minutes (no specific temperature needed), it should get a faint shade darker and smell wonderful. Whisk in baking soda.
Remove from heat and set aside for 2 to 3 minutes. It’s not going to significantly cool off, just settle a little. Lightly beat your eggs in a spouted measuring cup (for easiest pouring) or small bowl. Take a deep breath. Whisking the honey mixture vigorously in the pot the whole time, drizzle the thinnest stream (think: 1/2 teaspoon at a time, that slowly) of the eggs into the honey mixture. Do not stop mixing. Continue until all of the eggs are thoroughly whisked in.
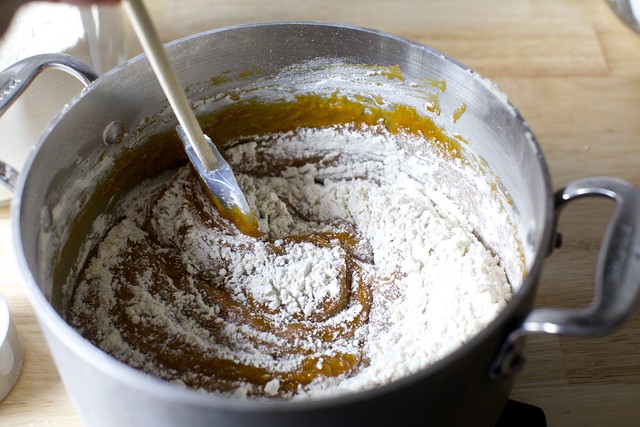
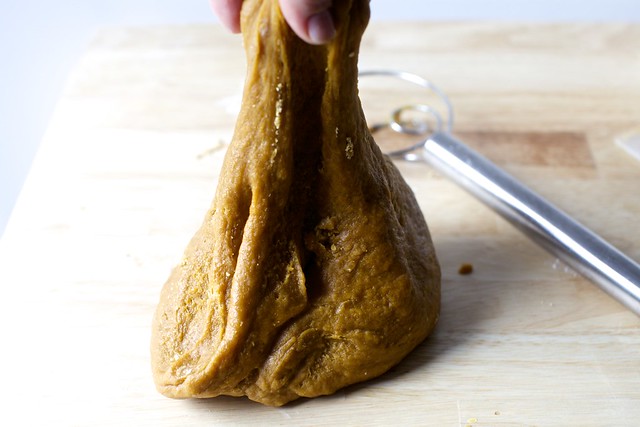
Stir in the salt and vanilla and 3 cups (390 grams) of the flour with a spoon. The dough is going to be thick like a bread but you’ve got this. Stir in the last 1/2 cup of flour 1/4 cup at a time; you’ll get a bonus arm workout.
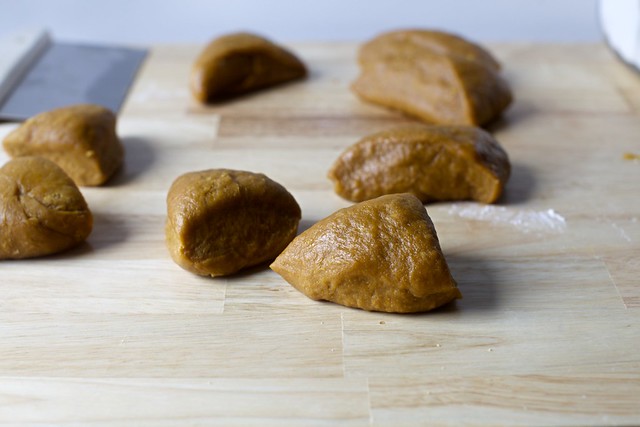
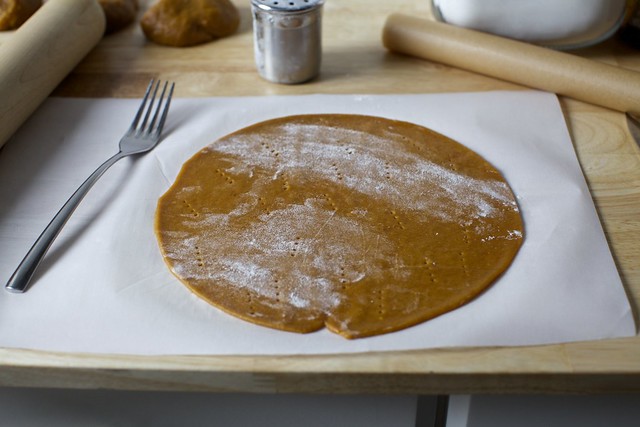
Shape and bake the cookies/cakes: [Plus, a bunch more layer tips at the end.] Lightly flour your counter and divide the still-warm dough into 8 even pieces. Roll the first one between two sheets of parchment paper (no flouring needed) to a slightly-bigger-than-9-inch round. Remove top sheet of parchment paper. Very lightly dust the top with flour if you’re going to put something on it (such as the bottom of a 9-inch cake pan or the rim of a 9-inch bowl) to trim the shape to an even 9-inch circle. Save the trimmings — put them aside on one of the sheets of parchment paper, it’s fine if they overlap a little. Dock the circle all over with a fork. Slide your 9-inch round onto a baking sheet and bake for 6 to 7 minutes; it should feel firmish and get slightly darker at the edges. Slide the cookie onto a cooling rack. Go ahead and reuse the parchment for another layer.
Meanwhile, while the first layer is baking, roll out your second piece so it’s ready to go into the oven as soon as the first comes out. If you’re making good time, get the third ready too and continue to bake them two at a time. Keep adding the unbaked cookie trimmings onto one piece of parchment paper. Repeat this process as you bake each round and you’ll have all 8 baked before you know it.
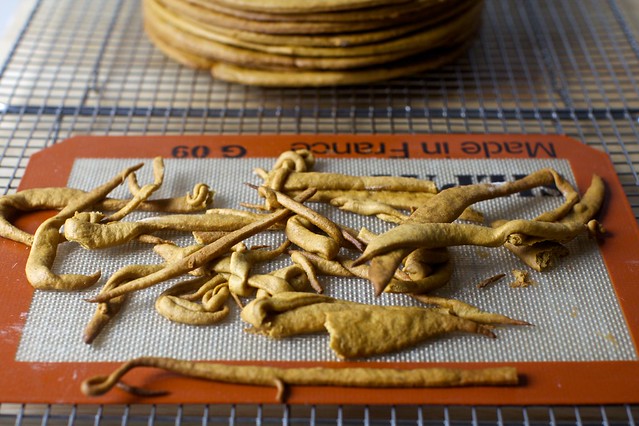
Finally, take that last sheet of parchment with all of the cookie scraps on it and slide it onto a baking sheet and bake it, checking in at 4 minutes, because the thinnest scraps will want to burn quickly. By 5 minutes, all should be baked until pale golden. Let cool completely and save until you’re ready to decorate the cake tomorrow.
Fill and frost the cake: Whisk sour cream and sweetened condensed milk together in a large bowl. Once cookies are cool, place a dab of the sour cream mixture on your cake plate and place the first cookie on top of it to help adhere it.
Cut or tear one of your used pieces of parchment paper into strips and tuck them all around the underside of the cake to protect your cake plate. Trust me, if you do not do this, you will regret it.
Scoop 3/4 cup sour cream mixture onto the center of your first cookie layer. Spread it only a little from the center, leaving a good 1- to 2-inch margin of unfrosted cookie. Stack the second cookie on top and repeat until you have 8 layers.
This will quickly become a huge mess. The sour cream is going to spill out and down the sides anyway (hear hear for those paper strips) and you’re going to start yelling at me/drafting an angry comment in your head. It’s also going to want to slide around and not stay neatly stacked. It’s totally okay because the filling will thicken as it absorbs into the cookies. Put the cake in the fridge for a couple hours (1 to 3) and when you come back to it, nudge the stack gently back into place and use a spoon and icing spatula to scoop the spilled-out filling back up the sides and onto the top of the cake. Don’t worry about it looking neat. Let it chill overnight.
The next day, finish the cake: Grind your baked, reserved cookie scraps in a blender or food processor, or bash them into crumbs in a bag with a rolling pin.
Take your cake out and do one final frosting clean-up. Spread any newly puddled sour cream back up the sides and across the top. If you’d like to make a decoration on top of your cake, take one of those used pieces of parchment paper (see how much Deb hates wasting parchment) and cut a stencil with it. Place it gently on top of the cake.
Use a small spoon to sprinkle the top and sides of the cake with the crumbs. In the coolest trick I saw on a cooking video, use a pastry brush (or extremely clean paintbrush, I won’t tell) to gently brush the crumbs off the stencil and across the cake in a thin layer. It sounds crazy but it works — on the sides too. Remove the stencil and parchment paper strips and look at that clean serving plate! (Bravo, you.)
You can serve the cake right away, or keep it in the fridge for up to 5 days. When slicing, I found that a knife dipped in hot water made picture-perfect cuts.
A bunch of extra dough and cake layer tips:
- The dough is a bit stiff, but it will stretch to the size you need with pressure. If you’re finding it to be a huge pain, that the dough clearly wants to go to 8 inches but not 9, just go ahead and make the cake 8 inches round. It will be just as good of a cake; the layers might need a single extra minute to bake.
- Ovens will vary, especially for such thin cookies, so keep an eye on the first round as of the 6-minute mark, checking in each minute after as it can brown very quickly, and then you’ll know how much time you need for the remaining ones.
- This dough is easiest to roll/softest when it’s still a little warm; if yours has cooled quickly, I found that you could put each piece in the microwave for 5 to 7 seconds (only!) to get it a touch warmer again, without prematurely baking the cookie.
- Go ahead and save all of those used pieces of parchment paper for the next step and beyond. We’re going to use them again.
Source: http://feedproxy.google.com/~r/smittenkitchen/~3/nBGvG51Y094/