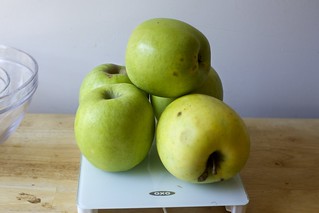
I did not intend to go on an apple pie making bender. I merely did what we always do in October: go apple picking, balk at the price of a bag, insist upon filling it way past the brim (because: economics) and then we ate some apples on the way home home and the bag was still overflowing. So I made an apple pie with 4.25 pounds of apples in it and the bag looked exactly as full as it had been at the orchard. Might they still be growing in there? It’s the only explanation.
I started with the apple pie recipe that’s been on this site for 12 years, but over the years I’ve tweaked it a little at home in small ways (different spice levels, some brown sugar worked in, thinner slices). This time, with some help from the genius Bravetart book, I tweaked it a lot, and it was the best apple pie I’ve ever made. So I did the only rational thing and brought slices of my pie-brag to everyone I saw for a couple days and then I ran out of pie and made another one using the same tweaks and it, too, was the best apple pie I’d ever made, so I did the only rational thing and made a third one and now I think it’s time for us to talk about what I think has made it so much better.


Out of loyalty to the old pie recipe, I wanted to do talk about in a new post because I know there are people who make it yearly and I don’t want to change the way it’s written. But that pie is 12 years old — that pie recipe would be IN MIDDLE SCHOOL right now — it’s okay if it’s not the same person it was in its toddler years and no I’m not projecting, you’re projecting, this is about pie, okay? [WAAAH.]
Here’s what I do a little differently these days (and do skip right to the recipe if you’re not into the Inside Baseball of all it):
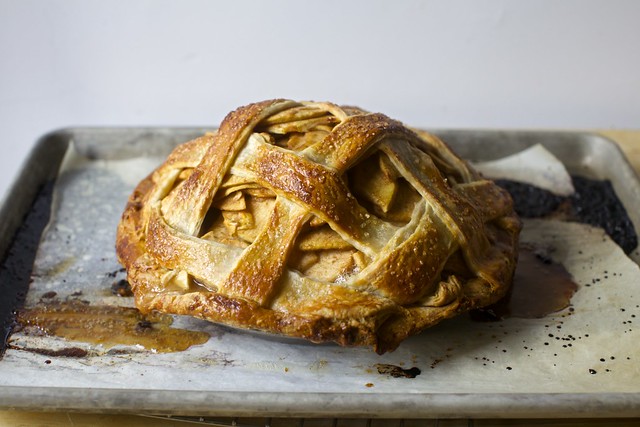
Time and temperature changes: Previously, I used the baking instructions from America’s Test Kitchen, which at the time were to heat the oven to 500°F, lower it to 425 after the pie was in, and then, 30 minutes later, reduce it to 375 for the remaining baking time, for about 60 minutes baking time total, which was also rarely enough. I bet you can guess what would actually happen every time I made this: I’d remember to reduce the temperature the first time, never the second, and it also looked overbaked before it was done. Stella Parks recommends baking the pie at a single temperature (400) for a longer period of time (75 minutes), and even gives you a suggested internal temperature if you’re nervous about doneness, and lo, it was perfect, with a crisp bottom crust (despite having no parbaking step) and with caramel-y juices. I haven’t looked back since.
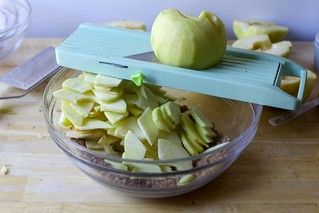
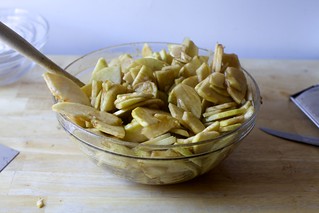
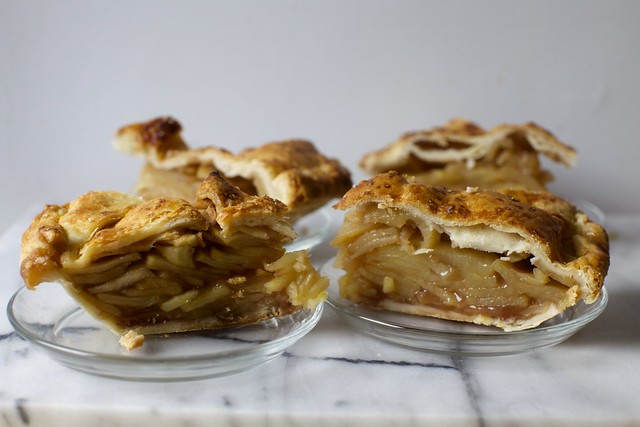
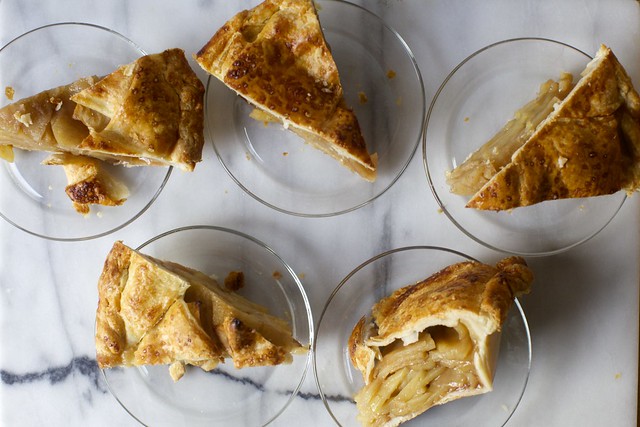
I use more apples and I cut them thinner: One of the most frustrating things that happens when you make a pie is that you put in what seems like a massive amount of fresh fruit but after it slumps, shrinks, and nestles in as it bakes, you’re left with a very flat, if not concave, pie. Parks has a fantastic tip of having you mix your filling and let it macerate for a while so that the apples soften, allowing you to put a lot more in the filling and leading to pie slices stacked to the brim with apples. My original recipe calls for 3.5 pounds of apples; I’m now using between 4.25 and 4.5 pounds. Better to have too much filling (and bake it separately in a dish for the oatmeal or yogurt topping of champions in the coming days) than too little. I also cut the apples more thinly, a scant .25″ thick, which also allows them to nestle in more tightly so they don’t fall as much when baking.

Order of operations: Because we’re going to let the apples macerate a bit, I now prepare them first, and the pie dough second. They don’t mind waiting.
I like a mix of apples — usually: Most apple pie recipes, including my original one, want you to use hyper-specific amounts of hyper-specific kinds of apples, which is rarely what anyone has. I feel strongly that a mix of apples, ideally ones that won’t fall apart when baking, see this awesome page if you want more guidance as to which ones to choose, is the way to get the most nuanced and dynamic apple flavor in a pie. Nobody wants a one-note pie. That said, the orchard we were in had a ton of massive mistu apples ready, and I made my last few pies with them only. Turns out they’re fantastic baking apples. “Uh, Deb, you just contradicted yourself.” Yes, and I want you, too, to go with the flow.
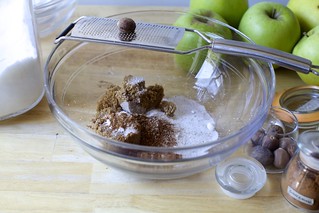
Flavor changes: Although I started skipping the lemon because we were out of lemons, when I didn’t miss the flavor at all, I never bothered putting it back in. Ditto with the lemon zest, which I found distracting. I also increased the cinnamon and added a little ground ginger (which won’t make it gingery, promise; it just seems to wake the pie up a little). Finally, I started swapping half, then more, of the sugar with brown sugar and I really don’t know why I wasn’t doing this all along. It’s lovely here.
Thickener changes: Over the last few years, as tapioca flour/starch (they’re the same thing) became more easily available (Bob’s Red Mill makes some, so check any store that stocks the brand, or here or here or here), I started using it as a pie thickener and never looked back. It’s clear and unchalky once baked, and doesn’t muffle the filling flavor the way I find some commercial thickening blends do. You’d never really know it’s there, which is basically the dream.
Previously
One year ago: Chocolate Olive Oil Cake
Two years ago: Baked Alaska, Indian-Spiced Cauliflower Soup, and Skillet-Baked Pasta with Five Cheeses
Three years ago: Broccoli Cheddar Soup, S’more Cupcakes, and My Old-School Baked Ziti
Four years ago: Latke Waffles, The Crispy Egg, Better Chicken Pot Pies
Five years ago: Miso Sweet Potato and Broccoli Bowl
Six years ago: Spaghetti with Broccoli Cream Pesto and Pumpkin Cinnamon Rolls
Seven years ago: Cumin Seed Roasted Cauliflower with Yogurt
Eight years ago: Single Crust Plum and Apple Pie and Mushroom Lasagna
Nine years ago: Quiche Lorraine
Ten years ago: Black and White Cookies, Best Challah (Egg Bread) and Mom’s Apple Cake
Eleven years ago: Bronx-Worthy Bagels, Peanut Butter Brownies, and Arroz Con Pollo
[New!] Twelve years ago: Lemon Cake
And for the other side of the world:
Six Months Ago: Fig Newtons
1.5 Years Ago: Cornbread Waffles, Mushroom Tartines, and Almond Horn Cookies
2.5 Years Ago: Spring Chicken Salad Toasts, Caramelized Brown Sugar Oranges with Yogurt, and Potato Pizza, Even Better
3.5 Years Ago: The Consolation Prize (A Mocktail) and Baked Chickpeas with Pita Chips and Yogurt
4.5 Years Ago: Dark Chocolate Coconut Macaroons
Even More Perfect Apple Pie
- 1/2 cup (95 grams) light or dark brown sugar
- 1/4 cup (50 grams) granulated sugar
- 1/4 teaspoon fine sea or table salt
- 2 teaspoons ground cinnnamon
- Freshly grated nutmeg, to taste, or about 1/4 teaspoon ground
- 1/4 teaspoon ground ginger
- 1/8 teaspoon ground cloves
- 4 1/4 to 4 1/2 pounds baking apples, shown here with mutsu (which is like a mix of Granny Smith and Golden Delicious) but more suggestions here
- 3 tablespoons tapioca flour or starch
- 1 recipe All Butter, Really Flaky Pie Dough, or your favorite recipe, or a storebought dough
- 1 egg, lightly beaten (optional)
- Coarse or raw sugar for sprinkling (optional)
Filling
Crust
Prepare crust: Make your pie dough according to instructions. If you need to chill it for an hour or two before rolling it out, you can do so now. If yours is already chilled and ready to go, roll out the first half on a well-floured counter [more detailed instructions here] to a 14-inch circle and transfer it to 9-inch standard (not deep-dish) pie plate. With scissors or kitchen shears, trim overhang to one inch all around. Refrigerate dish and dough until needed.
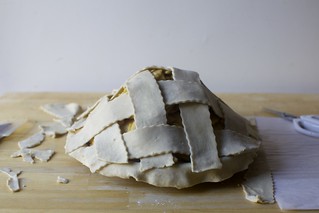
For a regular pie lid, roll out the second dough half into the same sized circle, transfer it to a large parchment-lined baking sheet and chill this as well until needed. For a lattice or woven pie lid, you can use the same sized circle, or you can just roll it into a rectangle at least 14″ in one direction, and then as long or wide you can get it in the other. Transfer it to a parchment-lined baking sheet and chill this as well until needed.
Heat oven: To 400°F.
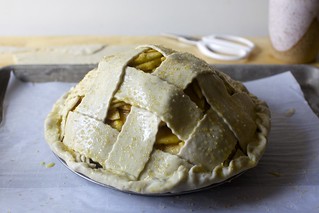
Assemble pie: Stir tapioca starch into apple pie filling. Pour filling into prepared bottom crust and use your hands to pack and heap those softened apples as mounded as you can get them, then add a few more. Pour any juices that have accumulated carefully over apples; do not leave any behind. Either place your second pie dough round over the filling or cut it into strips to lattice the top. [Detailed classic lattice instructions here, or try some of Erin McDowell’s gorgeous iterations.] Trim the top crust or lattice strips to the edge of the pie dish. Fold the overhang from the lower crust over to form a thick rim, and crimp it together with your fingers or a fork to seal it. Brush top crust with egg, then sprinkle with sugar if desired. If your top crust is in one piece, cut a few vents in it with a sharp knife.
Bake pie: Reuse that sheet of parchment paper on the large baking sheet for easier cleanup, then transfer your prepared pie onto it. Bake for 75 minutes, turning once or twice for even color. If your pie is browning too fast, take a large square of foil, mold it over the back of a large bowl into a convex dome, then use that to cover the pie in the oven for the remaining baking time so it doesn’t brown much further. Pie is done when juices are bubbling visibly through the vents or lattice, or when the internal temperature reads 195°F. A tester inserted into the pie shouldn’t hit any overtly crunchy apple pieces.
To serve: Cool pie for at least one hour at room temperature before cutting into it. However, your filling will not fully thicken until it has fully cooled, ideally in the fridge for a couple hours. You can rewarm slices as you serve them, if desired. Leftovers keep at room temperature for 2 to 3 days, and in the fridge for 1 week.
Source: http://feedproxy.google.com/~r/smittenkitchen/~3/9c2y_nyLNo0/