
As I’ve already admitted, I’m a boring preggo. No crazy dreams, sobbing at diaper commercials, middle of the night ice cream binges, pickle benders, sheesh, about the only thing I’ve ever gotten downright stereotypical about — eh, aside from months of frenetic nesting as evidenced by a gardening frenzy, walls! freezer stash and perhaps a few hasty furniture purchases — was when my husband came home from the store without the requested watermelon. How could he! Watermelon is edible air conditioning. It might be the only reason I’ve survived the summer thus far. It was a rough 22 minutes until he got back from the store (a whole block away) with more.
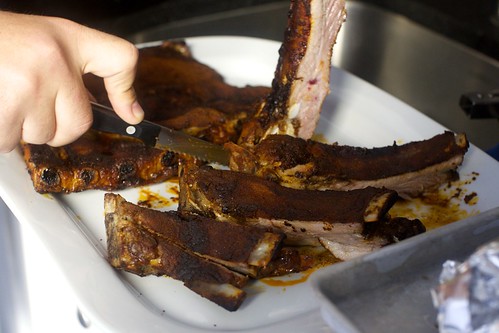
And so when a few weeks ago I began inexplicably craving barbecued ribs, I was ridiculously excited to have my first real, actual food urgency. “The baby wants ribs!” I texted a handful of meat-eating friends on a Friday afternoon, knowing that everyone likely had weekend plans and wouldn’t be able to make it, and thus fully underestimating the power of barbecue, like some sort of noob. Nope, not a single person was unavailable after reading the text, as will happen because: ribs. And so on Saturday morning, I sent my son on his two-wheeler down to Pino’s and told him not to come back with anything less than 3 racks (just kidding — I sent his dad along to assist) and got started on what is seriously the easiest and most popular summer party you can have — no grill required.
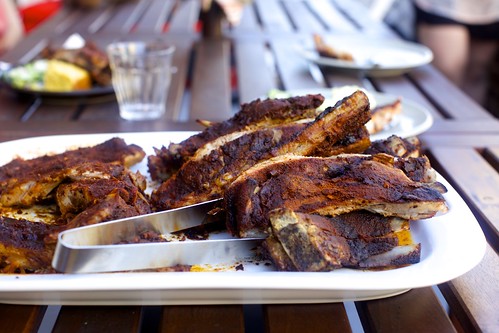
Seriously, we all need to do this at least once this summer. Promise you’ll do this. You can do this! We’ve talked about ribs before on this site so you might know that I’m a die hard dry rub fanatic, converted by my North Carolina barbecue-obsessed friend Molly several years back. Previously, I’d believed anything with the word “dry” in it should be kept far from my barbecue, thank you very much. Silly Deb, dry rub is more like dehydrated barbecue sauce: i.e. none of the clutter but all of the big loud awesome flavors, crusted right onto the surface of the slow-cooked, fork-tender meat until it melts into its own self-basted sauce. Unlike mopped-on barbecue sauce, it doesn’t try to slip away while your racks are cooking. You cannot mess this up.
I’ve been tweaking my dry rub recipe almost as long as I’ve been making it, and I think this summer, I finally got it where I wanted it — with the shortest and I hope most balanced ingredient list to date. I still make them the way Harold MacGee taught us in 2010: tightly wrapped in foil packets in the oven for many hours, but I’ve also found a lot of flexibility in the cooking time, so you can make the recipe work for you, even if you don’t have 6 hours to wait it out. At the time, I lamented that I couldn’t make them on a real outdoor grill or smoker. These days, even if I had one, I don’t even think I’d bother when they’re so low-maintenance and perfectly cooked, every time, from the oven.
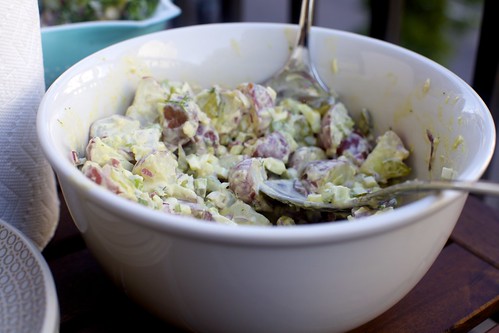
And while they’re cooking? Make some pink lemonade, bourbon slush punch, some potato salad, broccoli or classic slaw. How about some cornbread? Some quick pickles? Definitely some popsicles or grilled peach splits. There is no bad way to have a summer party, you’ll only regret the one you don’t have because it seems like too much work. It’s so not. You’ve got this in the bag.
 Picnics, Potlucks and Barbecues: My brain is set to Weekend pretty much the minute June begins. From pink lemonade, to that obsessively good avocado-cucumber salad, a nectarine-almond galette and easy-peasy blueberry crumb bars, I’ve gathered my 70 favorite ways to be the most welcome guest at all of this summer’s picnic and potluck festivities, over here.
One year ago: Cherry Almond Dutch Baby
Two years ago: Peach and Pecan Sandy Crumble
Three years ago: Chopped Salad with Feta, Lime and Mint (don’t miss this! it’s so much more than the sum of its parts.)
Four years ago: Blueberry Yogurt Multigrain Pancakes
Five years ago: Strawberry Rhubarb Pie, Improved
Six years ago: Horseradish Potato Salad
Seven years ago: Project Wedding Cake
Eight years ago: Lemon Risotto
And for the other side of the world:
Six Months Ago: Roasted Grape and Olive Crostini
1.5 Years Ago: Rum Campari Punch
2.5 Years Ago: Cinnamon Brown Butter Breakfast Puffs
3.5 Years Ago: Fromage Fort
Oven Ribs, Even Better
Adapted and updated from Molly’s and Harold McGee’s Dry Rub Ribs
For 1 5-pound rack spare ribs; we estimate about a pound of ribs per person. We tripled this recipe for our first ribs party this summer, doubled it for our second. Makes about 1 cup rub per rack. (This is a thick coating and we prefer it this way.)
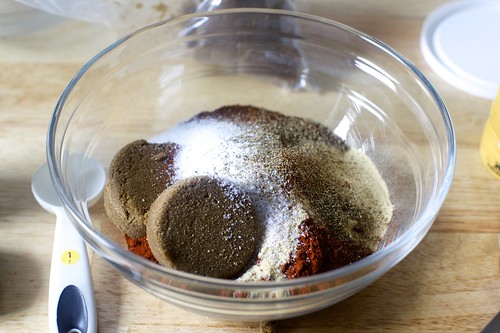
1/2 cup packed dark brown sugar
2 tablespoons paprika (sweet, hot or smoked, whichever variety you prefer)
3 tablespoons chili powder
1 tablespoon onion powder
2 tablespoons kosher salt (Diamond brand, which is very lightweight; for most others, use 1 1/4 tablespoons; more about why here)
Chipotle powder or ground red pepper (cayenne) to taste
As many cranks of freshly ground black pepper as your arm is in for
1 5-pound rack spare ribs
To finish: 2 teaspoons cider vinegar
Tools: If you can find it, a wide roll of heavy-duty foil makes the racks much easier to wrap up. You’ll also want a large rack (cooking cooling sheets, so long as they’re metal and thus ovensafe, are just fine) and a large baking sheet per rack of ribs.
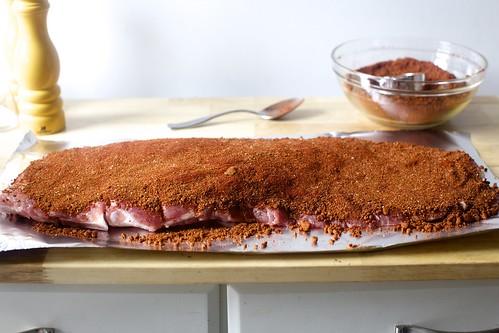
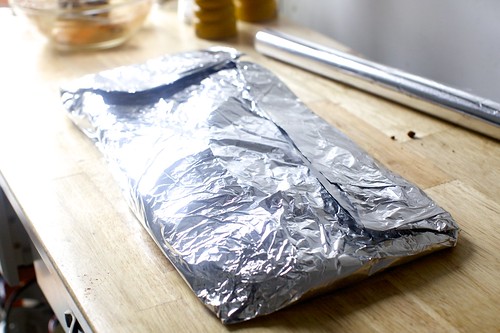
Heat oven to 200°F.* In a medium bowl, combine all of the spices and seasonings. On a piece of foil large enough to wrap around your ribs, place rack of ribs, meatier side up. Sprinkle half of spice rub over rack, patting it on generously, including the sides. Carefully — it can help have a second person hold the foil down while you lift the rack — flip the rack of ribs back onto the foil so that they’re now meatier side down. Pat on remaining rub. Tightly fold the foil to seal packets.
Set a metal rack (a cookie cooling sheet works well here) over a baking sheet and place foil-wrapped ribs on top. Bake for 4 hours, then reduce temperature to 175°F for 2 more hours, or until a fork easily penetrates the meat.
Open packet of ribs very carefully and pour accumulated juices into a saucepan. I find this easiest with one person lifting/tilting ribs packet and the other one snipping a corner and making sure the juices only go where you want them to. Bring the saucepan to a full boil and reduce the mixture until it becomes thicker, syrupy and will coat a spoon — usually by at least half. Stir in vinegar. This is the “barbecue sauce” for those that like it on their ribs; it will be fairly salty and I always warn people to use it judiciously.
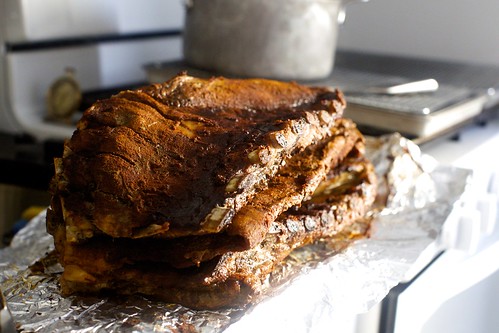
Meanwhile, cut the ribs apart and spread them on a serving tray. For extra caramelization, you can spread them back on their baking sheet (sans rack) and run them under the broiler for a couple minutes.
Serve ribs with sauce on the side.
* Let’s talk about timing: These cooking times and temperatures, laid out by the great Harold McGee, require 6 hours. But, real life ensures that I always start them late, and while “low and slow” is the barbecue bible for a reason — you’re always going to get the best meat from the longest gentlest cooking times — you’d be pretty amazed by the results of even 3-hour ribs. Long cooking times are not an exact science. As with humans, heh, some ribs are meatier than others and will take longer. Regardless, if you’re looking for guidelines, here are some other time and temperature combinations that have worked for us in the past:
2 1/2 to 3 hours at 300°F.
3 1/2 to 4 hours at 250°F.
4 hours at 225°F
We’ve also fiddled with combinations, such as a higher temperature at the beginning, and then, upon realizing they’d be ready sooner than we’d need them, turning them down to 175°F for the remaining time. And vice-versa, starting with the low temperatures in the original recipe, and realizing at the 4 hour mark, they were coming along too slowly and finishing them at 300°F. I hope these extra options make it easier, and not more confusing, to make yours at home.
Source: http://feedproxy.google.com/~r/smittenkitchen/~3/GuEWq1PTa8I/