I have grandma tastes. I don’t have a pocketbook full of butterscotch candies or a plastic cover on the sofa or anything, but I’m sitting on it right now and think our elders are probably onto something, especially when you have two kids with an unnatural contempt for napkins. But I will stan [Grandma Deb has Googled this word, feels ready to give it a spin] for thick cardigans, tins of Danish butter cookies, Walkers shortbread, and Fig Newtons.

I’ve wanted to make a homemade version of fig newtons since I started this site nearly 12 years ago. In that time, I have bookmarked a dozen versions that claimed to be like the original packaged cookie but all seemed off somehow — too sweet or too wholegrain, to muddled with other flavors, not actually shaped like the original, or just so fussy, if even I couldn’t muster the motivation to make them, it didn’t bode well for talking anyone else into it. I am glad I waited because last fall pastry wizard Stella Park’s BraveTart cookbook came out and if there is anyone that can be trusted to come up with a version as good as the original but with a more appetizing ingredient list, it is her.
Have you seen this book? It’s incredible; part American classics (hello: Wonder Bread, Nilla Wafers, and McDonald’s Apple Pie Turnovers), part history book (did you know that the fig newton was patented as a “fruit biscuit” in 1892 and was likely inspired by 19th century fig cakes, spiced and layered with thick jam?) but I bought it for the breathtaking Oreos on the cover alone, how could I not, please don’t tell my existing favorite recipe.
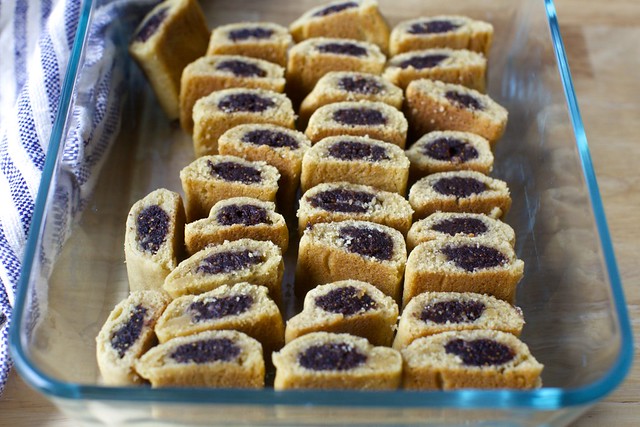
Park’s version of fig newtons uses dried figs in a no-cook filling that’s as concentrated and jammy but firm as the originals. The cookies have butter and brown sugar for a better-than-original taste, and the instructions are about as simple and straightforward as I’ve seen them for a cookie that’s a bit of a structural wonder. The resulting cookie has the unique cakiness of the original, as well as the mild sweetness, so mild that they such a hit for afternoon snacks, at playdates, and even for the occasional breakfast cookie.

Previously
One year ago: Almond Horn Cookies
Two years ago: Eggs in Purgatory, Puttanesca-Style, Spring Chicken Salad Toasts, and Caramel Brown Sugar Oranges with Yogurt
Three years ago: Carrot Graham Layer Cake, Wild Mushroom Pate and Why You Should Always Toast Your Nuts
Four years ago: Three-Bean Chili and Asparagus-Stuffed Eggs
Five years ago: Spinach and Smashed Egg Toast
Six years ago: Over-The-Top Mushroom Quiche and French Onion Soup
Seven years ago: Spinach and Chickpeas, Bakewell Tart, Romesco Potatoes, and Baked Kale Chips
Eight years ago: French Onion Soup
Nine years ago: Cream Cheese Pound Cake with Strawberry Coulis, Beef Empanadas, Bialys, and Chewy Amaretti Cookies
Ten years ago: Fast White Bean Stew, Whole Wheat Pasta with Cauliflower, Walnuts and Feta, and Caramel Walnut Upside-Down Banana Cake
Eleven years ago: Arborio Rice Pudding, Potato Rosemary Bread
And for the other side of the world:
Six Months Ago: Chocolate Olive Oil Cake
1.5 Years Ago: Magic Apple-Plum Cobbler
2.5 Years Ago: Broccoli Cheddar Soup and S’More Cupcakes
3.5 Years Ago: Cucumber Lemonade, Sunken Apple and Honey Cake, Latke Waffles, and The Crispy Egg
4.5 Years Ago: Pink Lemonade Popsicles, Zucchini Parmesan Crisps, and Baked Pasta with Broccoli Rabe and Sausage
Fig Newtons
- 10 tablespoons (140 grams or 5 ounces) unsalted butter, cold is fine, cut into small chunks
- 1/2 cup (110 grams or 4 ounces) light brown sugar, gently packed
- 1/2 plus 1/8 teaspoon baking soda
- 1/4 teaspoon kosher salt
- 2 tablespoons (30 grams) honey or golden syrup
- 1 tablespoon orange or apple juice
- 1 large egg
- 1 large egg yolk
- 2 1/4 cups (295 grams or 10 1/2 ounces) all-purpose flour
- 12 ounces (about 2 1/2 cups or 340 grams) plump, sticky dried mission figs, stems trimmed
- 1/3 cup (100 grams or 3 1/2 ounces) applesauce, any variety
- 2 tablespoons orange or apple juice
- 1/2 teaspoon orange zest
Cookie
Filling
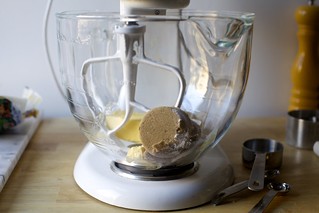
- Make the dough in a stand mixer:Combine butter, brown sugar, baking soda, salt, and honey in the bowl of a stand mixer fitted with a paddle attachment. Beat until fluffy, which will take up to 5 minutes; scrape the bowl down a few times to help it along. Add orange juice, then add the egg and yolks, beating between them, and continue beating until smooth. Reduce the speed to low and sprinkle in the flour, mixing until well combined.
- I nixed the warm spices (1 teaspoon orange zest, 1/4 teaspoon ground cinnamon) in the cooke dough that are a nod to the real originals; my fig newton experience began in the package, and I longed for this spice-free effect. (But couldn’t resist a little orange zest in the filling, as it’s so good here.) I used apple juice where orange juice was called for, but again, this is just my preference. I also found I could use 1 whole egg in place of 2 of the 3 yolks.
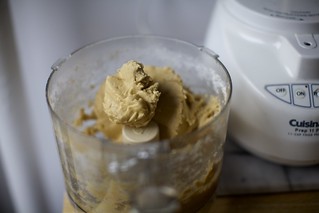
- I made them both in a stand mixer and a food processor; I preferred the food processor for the dough, but of course I always do. I found you could skip softening the butter, regardless of method, but you need to really and truly beat it until it is fluffy, which will take a minute or two longer.
- The first time I made them, I rolled them out, as directed, on a floured counter, but I found it easier (and less sticking- and crack-prone) the second time, when I rolled out between two sheets of parchment paper without flour. The resulting cookies are much more smooth, and bent more easily over the filling without cracking.
- Psst, Trader Joe’s sells these figs in exactly a 12-ounce container.
- To get the cake-like effect of the original, the book has you “steam” the cookies in a tin while they’re still warm, but for me, these ended up so soft, they ended up almost falling apart. The second time, I cooled them fully at room temperature and kept in a tin overnight, they were exactly right. After a day, they were, in fact, so tender, I kept the lid halfway off for the rest of the time we had them and this seemed to keep them from getting too soft. You might find you need to do a little lid on and lid off time to keep yours tender but not crumbly. It will be absolutely worth it. I also find them easier to cut cleanly with a sharp knife, even a thin paring knife vs. a bench scraper, but this is where my persnicketiness ends. You know, for today.
Or make the dough in a food processor: Combine butter, brown sugar, baking soda, salt, and honey in the bowl of a food processor. Blend until fluffy, which will take a minute or two; scrape the bowl down a few times to help it along. Add orange juice, then add the egg and yolks, blending between them, and continue blending until smooth. Reduce the speed to low and sprinkle in the flour, pulsing until well combined.
Both methods: Scrape dough onto a piece of plastic and wrap it in a flat disc. Chill for one hour.
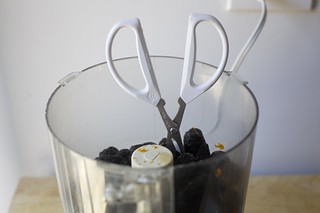
Meanwhile, make the filling: Cut the figs in half (although I skipped this because mine were so soft and it wasn’t a problem). Pulse with applesauce, orange juice, and zest in a food processor until roughly chopped, then process to a thick, smooth paste. Scrape the bowl and blade with a flexible spatula, then process a minute more to ensure absolutely no chunks remain. Transfer to a sturdy piping bag fitted with a 1/2-inch plain round tip if you have one, or just a sturdy freezer bag with a 1/2-inch opening snipped from the end (both methods worked for me) and set aside until needed, up to 24 hours.
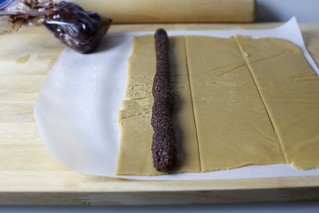
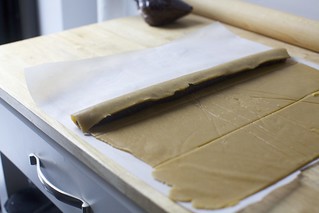
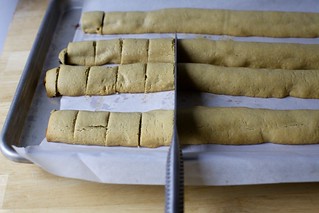
Assemble your cookies: Heat oven to 350°F (175°C). Line a large baking sheet with parchment paper. Roll your cool dough between two large pieces of parchment paper to about a 15-inch square, however, both times I made them, I couldn’t get mine this thin. What’s most important is that your dough is 15 inches wide; if it comes up a little short in the other direction, the cookies still work. If you dough has gotten too soft and wants to stick to the parchment, just slide it onto the back of a baking sheet and into the freezer for 2 to 3 minutes, after which it should be easy to peel off the top sheet. Cut dough into four 3 1/4-inch strips.
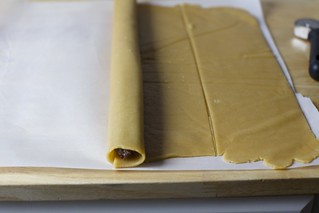
Holding the bag at a 90-degree angle just above the surface of the dough, pipe a just-shy-of-1-inch-wide tube of filling down the center of each portion. Use your bottom sheet of parchment as a sling to fold a long flap of dough over each strip, press it against the filling, then continue to use the parchment to roll the dough the rest of the way over. Dough will overlap a little.
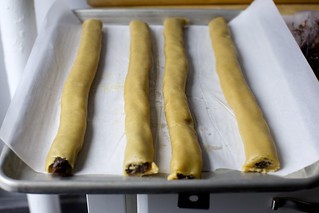
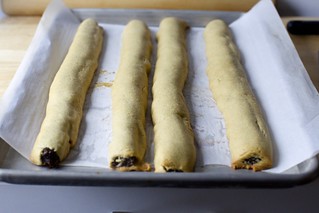
This part will be terrifying no matter what, but take your time to loosen, slide a spatula underneath, and lift this log onto your prepared baking sheet. Did yours break? One of mine did and I found if I pressed the broken parts back together, it “healed” pretty well in the oven. Gently press logs just a tiny bit to begin to flatten them into the traditional fig newton shape. Repeat with remaining strips of dough and filling. All four bars should fit on a single sheet.
Bake: Until the bars are puffed and firm, without any significant browning, about 15 minutes. Immediately cut into 1-inch pieces with a sharp or serrated knife. Let them fully cool on tray, then transfer them to an airtight container overnight to achieve the uniquely cakey texture. (If you eat them right away, they’ll seem a little dry.) Store for up to 1 week at room temperature or up to a month in the fridge. I found after the initial softening, my cookies did best at room temperature when the lid was ajar, or else they got too soft.
Do ahead: The dough can chilled for up to one week. If it chills for more than an hour, you should soften it at room temperature for 30 minutes before using it. The preserves can be refrigerated in an airtight container for up to 3 weeks; bring to room temperature before using.
More Notes:
Source: http://feedproxy.google.com/~r/smittenkitchen/~3/IiTsv06BVbY/