posted by on February 9, 2018


 Hello friends! Please say hi to Rachael!
Rachael lived in Japan for a number of years and here’s her story and a step by step photo tutorial on how to make Gyoza.
~ Jaden
How did a girl who was born in the Rocky Mountains and raised in California and who graduated with French and Law degrees end up writing a food blog called La Fuji Mama and striving to perfect her gyoza recipe? The story starts seven and a half years ago when I married a man who had lived and studied in Japan. Six months into our marriage, we moved to Japan, a place completely foreign to me. Before my marriage, I had traveled all over Europe and lived in Paris, but I had never imagined that I would ever live in Asia. But there I was, living on the outskirts of Yokohama in a tiny little 400-square-foot, two-bedroom apartment in a neighborhood devoid of any other foreigners.
My kitchen consisted of a large sink, a gas range with two burners and a “fish fryer” beneath the burners (like a little mini broiler), a refrigerator that was considerably shorter than I was, a toaster oven, and two cupboards. I spent my free time exploring, eating, watching and listening, and loving each moment more than the last. After almost a year, we returned to the States. Three years later, my husband’s company asked him to transfer to Tokyo, which he happily agreed to. I soon found myself living in Japan for the second time, this time in downtown Tokyo, in a slightly larger 950-square-foot, three-bedroom apartment, with a slightly larger kitchen, and a spectacular view of Mt. Fuji.
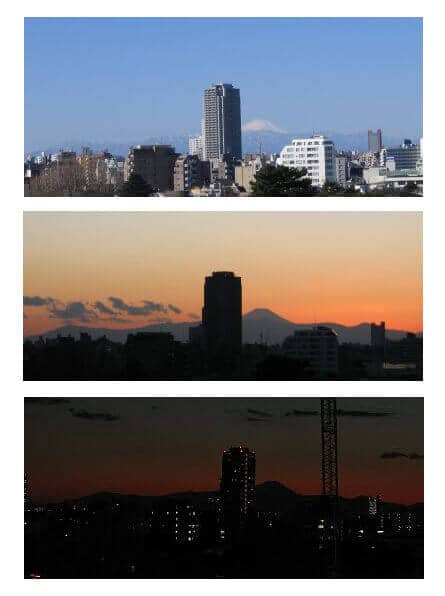
I quickly settled into life, feeling much more comfortable the second time around, and trying to embrace the experience. Our ties to Japan were further strengthened by the birth of our first child in a Japanese hospital. A piece of my heart will always be in Tokyo because of that experience.
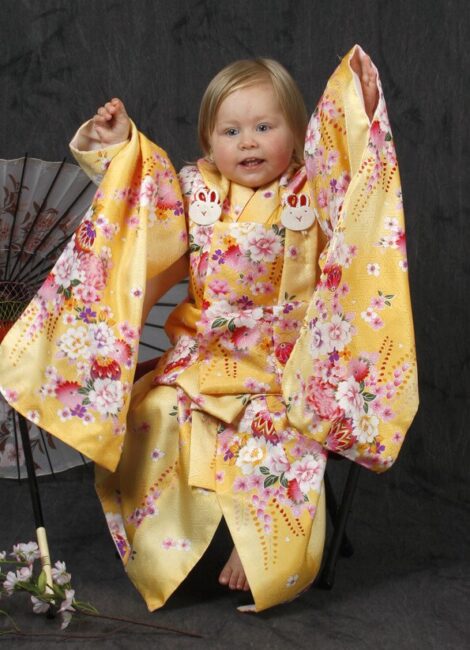
Our move back to the US a year ago was a difficult one, but we try to keep the “homesickness” for Japan at bay with trips to Mitsuwa (our nearest Japanese grocery store) and lots of home cooked Japanese meals.
My first foray into Japanese home cooking started a few weeks after we moved to Japan the first time. One of my neighbors, a woman named Miki, periodically knocked on my door to ask if I wanted to “cook and talk.” I looked forward to those knocks – they meant that I got to accompany her to her apartment and spend an hour with her, helping her to both cook a meal and practice her English. It was in her kitchen that I stuffed and pleated my first gyoza.
Miki made it look easy–her hands rhythmically pleating the top layer of the gyoza wrapper and simultaneously pinching it against the smooth bottom layer as she went–finishing each gyoza within moments of having started it. My first gyoza took me forever to complete, looked sloppy, and didn’t hold together well when cooked. But with a few pointers from Miki, my gyoza quickly started to look more as they should (although I still can’t stuff and pleat a gyoza as fast as she could).
Over the last seven years I’ve tweaked the gyoza recipe I learned from Miki, adjusting the amounts of ingredients here and there to suit our palates, and adding a couple of ingredients used by other wonderful Japanese cooks I’ve met along the way.
My most recent adjustment to the gyoza recipe is in the technique I use when mixing the filling. In Elizabeth Andoh’s cookbook, Washoku, she describes a method that helps tenderize the meat and helps hold the filling together. She explains that it’s “a bit like baseball practice” because you are gathering the filling into a ball and throwing it back into the bowl repeatedly. The bonus to the technique is that you get to play with your food.
How to make Japanese Gyoza
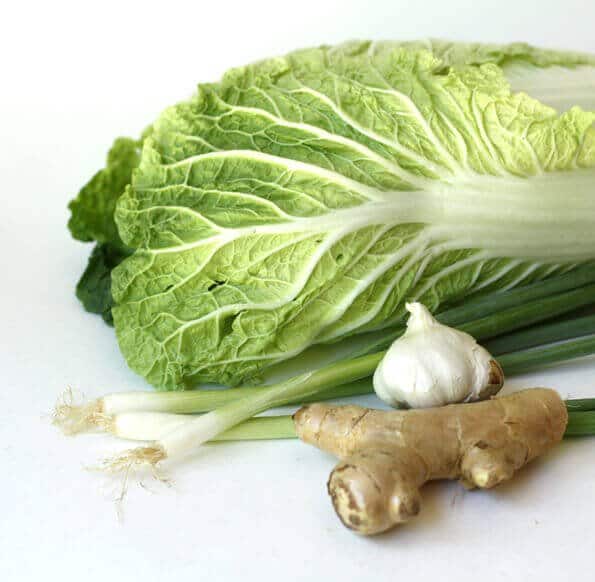
Gyoza are really easy to make. Just mince, grate, and measure out your ingredients as called for and then mix the gyoza ingredients together in a bowl using your hands. These gyoza have a hint of heat from the addition of red chili powder. They also contain aka miso paste (red/dark miso paste), which has a wonderful pungent salty flavor. If you cannot find aka miso paste, you can either leave it out altogether, or subsitute shiro miso paste (white miso paste). If you leave the miso out, increase the salt by 1/2 teaspoon. If you substitute shiro miso paste, leave out the sugar and increase the salt by 1/4 teaspoon.
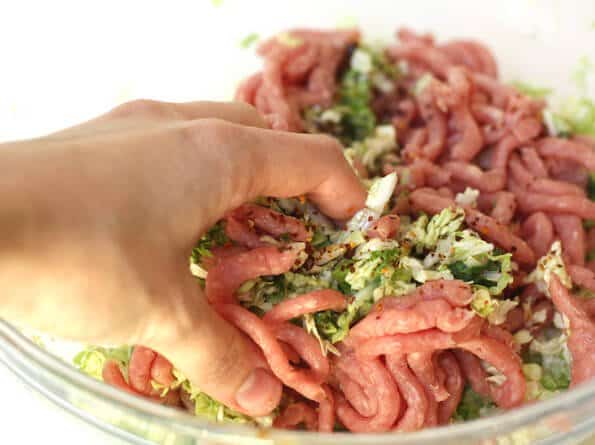
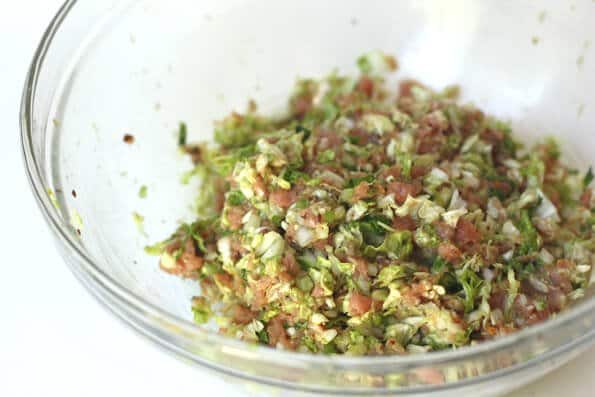
Yep, you’ve gotta get your hands dirty to make these! Next you’ll use Elizabeth Andoh’s “baseball practice” technique. Scoop up the mixture into a ball with your hands and throw it back with some force into the bowl. Repeat this several times to tenderize the meat and help the mixture stick together. Now it’s time to form your gyoza. Put a bit of the meat mixture in the center of a wrapper, get your fingertip wet and then trace a line around half of the wrapper.
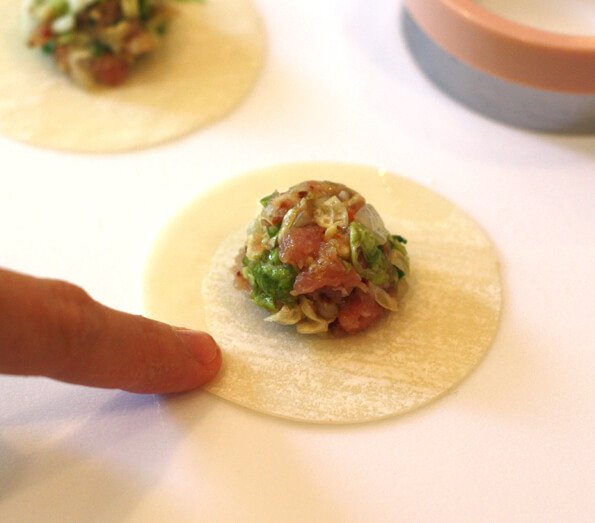
Then you fold the wrapper in half over the filling,
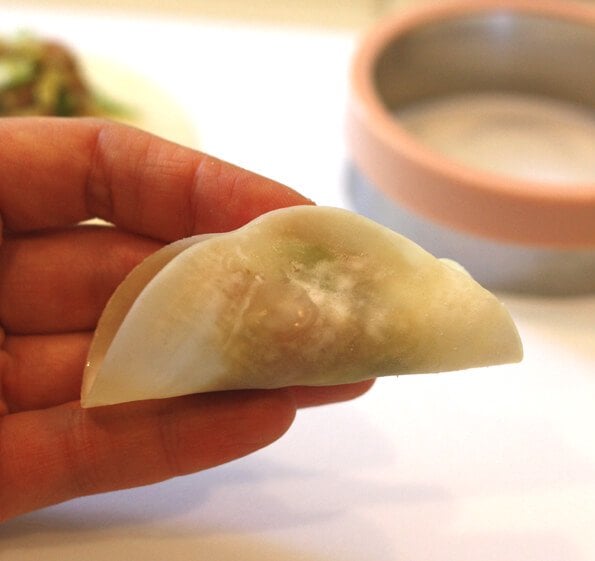
and pinch it in the center.
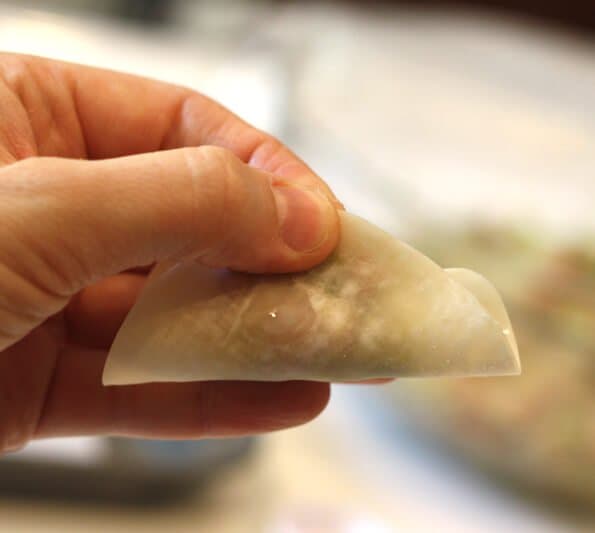
Now comes the fun part–the pleating! Holding the wrapper in that middle spot that you just pinched with your left hand, make a pleat in the top part of the wrapper, pinching it against the flat edge of the wrapper at the back.
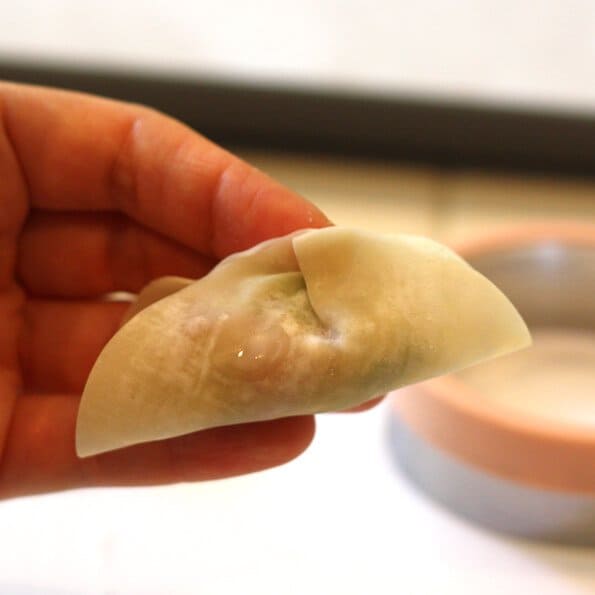
Holding the filled half-circle in the left hand, pleat the top of the wrapper from the middle out, pressing it to the flat edge of the wrapper at the back (only the front edge will be pleated–the back edge stays flat). Proceed to make two or three more pleats to the right of the first pleat.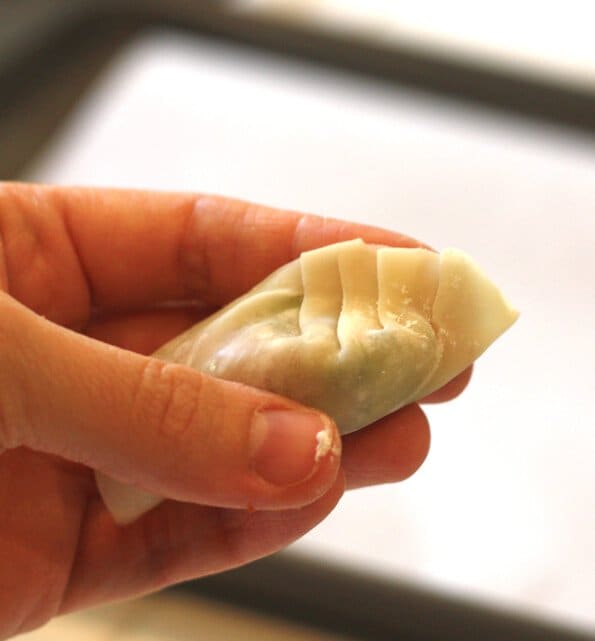
Then switch sides and pleat the other side (to the left of the pinched middle).
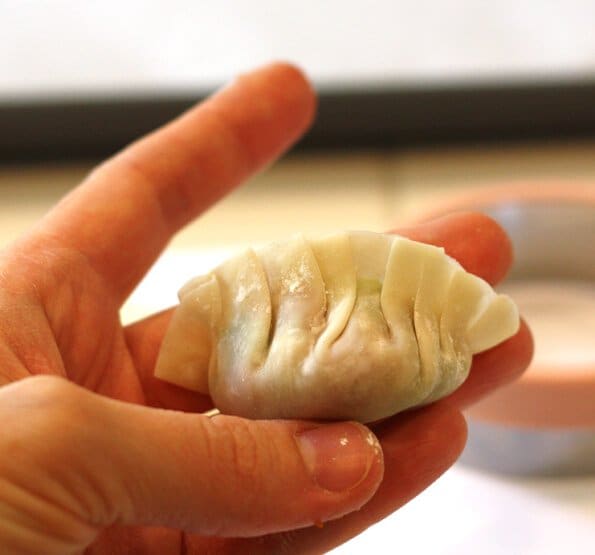
Set aside the stuffed dumpling with the pleated-wrapper edge up.
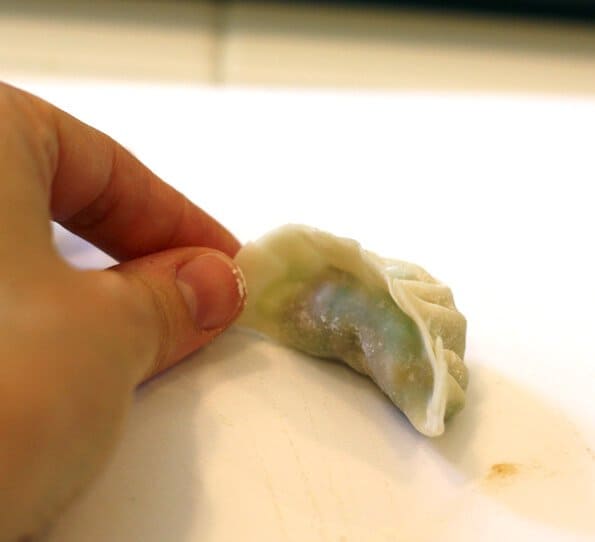
Repeat the process until all of your wrappers have been filled and pleated. It’s always nice to have a partner in crime for this part because it goes a lot quicker.
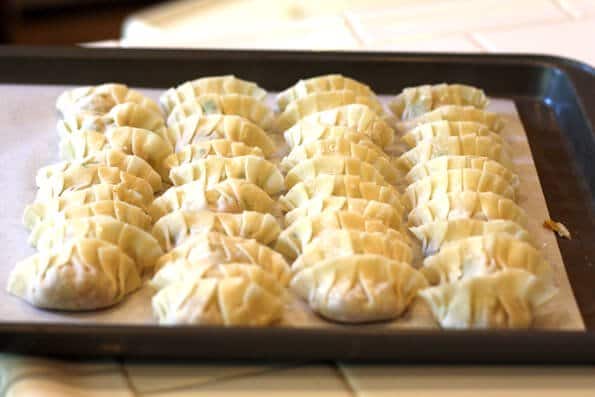
Now you can either cover the gyoza with some plastic wrap and put them in the fridge for a couple of hours until you’re ready to cook them (or you could freeze them to keep them for longer) or you can cook them right away. The gyoza are first fried on their flat side (pleats up),

until the bottom is nice and brown.
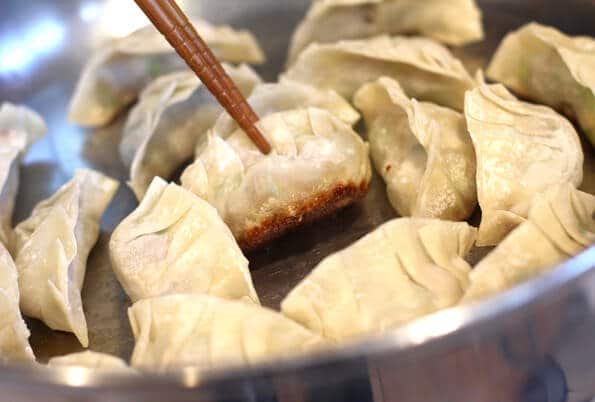
Then, water is added and the pan sealed with a lid
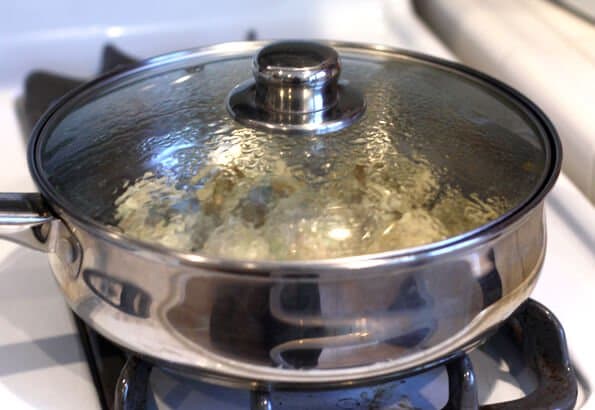
until the upper part of the gyoza is steamed.

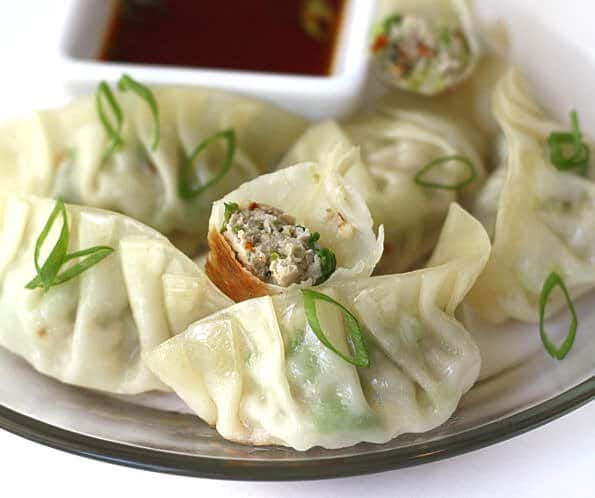
Then you serve them browned side up with a dipping sauce made from soy sauce, rice vinegar, and a few drops of chili oil.

If you can’t find round gyoza wrappers, you can always use square wonton wrappers and cut them into circles using a large biscuit cutter.
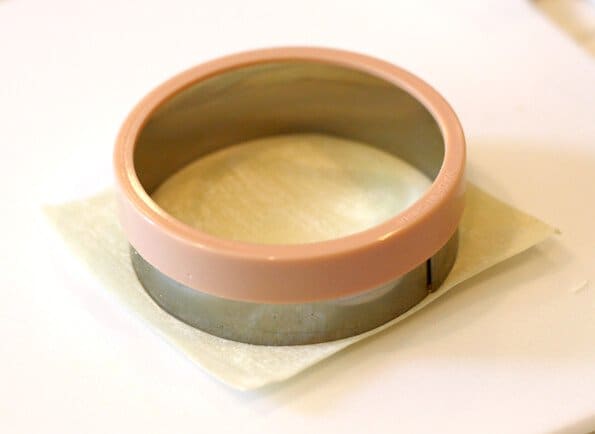
Or you can really go all out and make your own wrappers.
More Dumpling Recipes
Chinese Potsticker Dumplings (my Mom’s recipe) with homemade wrappers
Chinese Soup Dumplings Recipe (with Pork & Crab)
Xiao Long Bao
Steamed Siu Mai Dumplings
Curried Beef Dumplings

1 hr 10 mins
Makes 40 dumplings
Course: Appetizer
Cuisine: Japanese
Servings: 6 people
Calories: 403 kcal
:
- 4 cups loosely packed, minced Napa cabbage soft, green, leafy parts only
- 1 teaspoon kosher salt or 1/2 tsp table salt
- 10 ounces ground pork
- 2 teaspoons freshly grated ginger with a microplane grater
- 3 cloves garlic finely minced
- 1 stalk green onion green part only, minced
- 2 teaspoon Japanese miso paste red/dark miso paste
- 1 teaspoon Asian sesame oil
- 1/4 teaspoon red Asian chili powder optional
- 1/4 teaspoon sugar
- 40 dumpling wrappers
For cooking the dumplings:
- 4 tablespoon cooking oil like canola, vegetable
- 3/4 cup water
Dipping Sauce:
- 6 tablespoons soy sauce
- 3 tablespoons rice vinegar
- Several drops of chili oil or Asian sesame oil
-
Toss the minced cabbage with the salt in a large bowl and let it sit for 10 minutes. Using both hands, or a cheese cloth, squeeze the cabbage firmly to drain and discard the excess water (prevent your dumplings from becoming mushy) and then transfer the cabbage to a deep bowl. Add the pork, ginger, garlic, green onion, miso, sesame oil, chili powder, and sugar. Mix everything together with your hands until all the ingredients are evenly distributed. Using your hands, scoop the mixture into a ball, lift it, and then throw it back into the bowl. Repeat several times to tenderize the meat and help the mixture stick together.
-
Have a small bowl of cold water ready. Lay a dumpling wrapper on a dry work surface, and place a teaspoon of the meat mixture in the center of the wrapper. With a fingertip moistened with water, trace a line along half of the edge of the round wrapper. Fold the wrapper over to enclose the filling, and pinch the wrapper in the center to seal the edges together at that spot. Holding the filled half-circle in the left hand, pleat the top of the wrapper from the middle out, pressing it to the flat edge of the wrapper at the back. Set aside the stuffed dumpling with the pleated-wrapper edge up. Repeat to make 40 dumplings in all.
-
In a large skillet with a tight fitting lid, heat 1 tablespoon of the cooking oil over medium-high heat. Carefully place as many of the dumplings that can fit without touching in the skillet with the pleated-wrapper edge up. Cook the dumplings for 3 minutes, or until nicely browned on the bottom. Check the progress by lifting 1 or 2 dumplings by their pleated edge.
-
Once the bottoms are nicely browned, use the skillet lid to shield yourself and carefully pour in 1/4 cup of the water. When the hissing and splattering die down, drizzle in 1 teaspoon of the cooking oil around the edge of the skillet. Place the lid on the skillet to trap in the moisture and then quickly lower the heat to keep the liquid at a bare simmer.
-
Check the dumplings after 2 minutes. When the wrappers appear slightly translucent and the meat feels firm when pressed lightly with a spoon, remove the lid and raise the heat slightly. Continue to cook until all the water has evaporated and only the oil remains (about 2 minutes). Once you hear a sizzling sound, shake the skillet. The dumplings should slide about. If they seem to stick to the skillet, move the skillet away from the stove and replace the lid for a moment. Remove the dumplings from the skillet with a broad flexible spatula. If you’d like, flip them over so that the seared surface faces up. Cook the remaining dumplings the same way. Serve the dumplings hot accompanied by the dipping sauce.
-
While the dumplings are cooking, make the dipping sauce by mixing the soy sauce, rice vinegar and sesame/chili oil together in a small bowl.
Nutrition Facts
Gyoza Recipe (Japanese Pan-Fried Dumplings)
Amount Per Serving
Calories 403 Calories from Fat 189
% Daily Value*
Total Fat 21g 32%
Saturated Fat 4g 20%
Cholesterol 38mg 13%
Sodium 1798mg 75%
Potassium 596mg 17%
Total Carbohydrates 36g 12%
Dietary Fiber 3g 12%
Sugars 2g
Protein 17g 34%
Vitamin A 10.9%
Vitamin C 53%
Calcium 15.8%
Iron 17%
* Percent Daily Values are based on a 2000 calorie diet.
Source: https://steamykitchen.com/5874-gyoza-recipe-japanese-pan-fried-dumplings.html