Before we snuck a grill onto our balcony one glorious day last May, I would regularly show up at friends-with-grills homes with prepared pizza dough and a few toppings in the summer; I love grilled pizza so much that I’d feed a crowd just to get my fix. It was one of the first things I made when we bought our own. The benefits of cooking pizza outside are manifold. With heat circulating all around the pizza and the dough resting on open grates instead of a flat tray, I find that you can get more texture — crisp on the outside but staying stretchy within — and flavor — charred spots that will immediately remind you of your favorite brick-oven pizzeria, without heating up your apartment, pretty much the last thing any of us want to do in the summer. Plus, it’s really quick. Once your dough is purchased or prepared, you could be eating your pizza in 10 minutes; not bad for a homemade dinner after a long day.
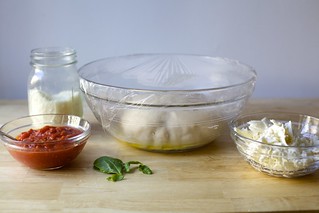
I’ve already discussed at length my favorite homemade margherita — my preference is for mozzarella that is packed dry, not the fancy stuff in water (despite what you see in the early pictures; promise you’ll save the fancy, ultra-tender stuff for serving cold and fresh with appetizers and salads, please) and for “raw” sauces, blended from canned or fresh tomatoes with some liquid poured off and then doctored up and seasoned well, for the best flavor — and I follow the same rules here. In the oven but especially on the grill, you must keep your toppings thin, light, and pre-sautéed or they simply will not cook before the crust is done; it also leads to puddled and wet pizza tops, something I’m sure we’ve all experienced.

While the upside of grilled pizza is a more nuanced crust and flavor, the downside is that it’s very hard to get the cheese on top browned. It’s just not what a grill (or really, most ovens) do well. Running the pizza under your broiler* back inside defeats the whole not-heating-up-the-kitchen agenda, but we do it once in a while as a finish. I’ll leave that up to you. Even if you skip it, you’re going to be happy with the results. Eating pizza outside on a warm evening with a fizzy drink or cold glass of rosé (and in our very spoiled case, a freshly-picked salad, perhaps the last of them as I think our lettuce is about to bolt) is pretty much a summer Top 10 for us. What’s on your list? I hope you get to at least two of those things this weekend.
* just to confuse, I’ve learned these are called grills in the UK; how fun this post must be to decipher from across the pond!
Grilled Pizza
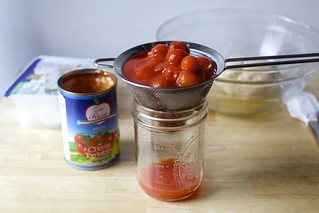
To doctor a can of tomatoes into a great pizza sauce, drain or pour off some (but not all) of the extra liquid in the can, and blend the tomatoes to your desired texture. Season with a few fine gratings of fresh garlic, salt, and red pepper flakes. Sometimes, a pinch of sugar helps overcome the acidic flavor of canned tomatoes. You also might use a few drops of red wine vinegar. Do not cook this sauce; it will cook on the pizza.
One of the most common things I’ve read about grilling pizza, and what used to be my least favorite thing about it, is that you have to be hyper-organized and ready to work quickly. I disagree; I grill the first side then, if I don’t have enough space to spread out outside, take it back inside, top all the pizzas at a normal pace — set the table, toss the salad, etc. — and finish grilling them when we’re ready to eat.
As written, this makes 4 thin, smallish pizzas. For us, this is an un-heavy meal with a big salad. But I know it’s a bit scant for heartier eaters. If you double it and find it’s more than you need, the extra dough will keep in the fridge for at least a day, sometimes two, and longer in the freezer. I don’t think anyone will mind if you have to make this again .
- 1 fully risen pizza dough (below) or about a 2/3 volume of my lazy fitted-to-your-schedule favorite or your favorite, whichever it may be
- Olive oil, for brushing
- 1 generous cup prepared tomato sauce (see note up top about doctoring your own)
- 8 ounces aged mozzarella (sold in plastic, not water) (this amount is light on the cheese, use more if that’s your preference)
- 1/4 cup finely grated parmesan or pecorino romano cheese
- Salt and pepper, to taste
- A few leaves of fresh basil, torn or sliced
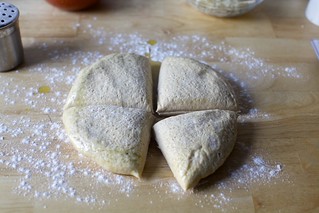
Divide your dough into four quarters. Use your hands to gently stretch it into a thinner blob — it doesn’t need to be round — then lay it on a plate where you can stretch it further. We’re looking for a thin dough but it doesn’t need to be paper-thin or it might get too cracker-like once cooked. For this reason, I absolutely prefer hand-stretched over rolling pin-rolled for grilled pizza. You want an uneven, hand-stretched, thinness with some thicker spots. Repeat with other three quarters.
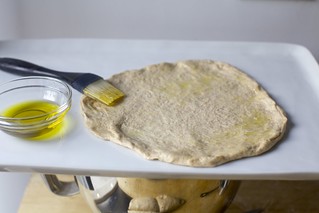
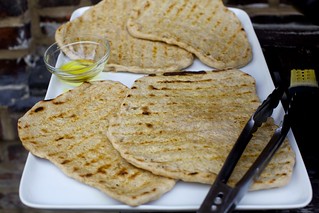
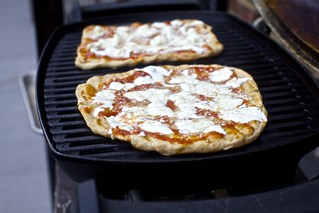
Brush tops of each thinly with olive oil. Place doughs oil-side-down on the grill (it will not fall through, promise) and cook for just a minute or two, until lightly browned underneath but still very doughy and soft on top. While they’re cooking, brush the tops of the doughs lightly with olive oil.
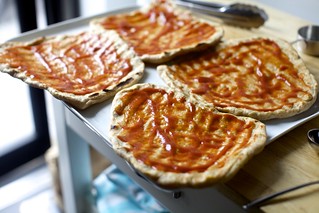
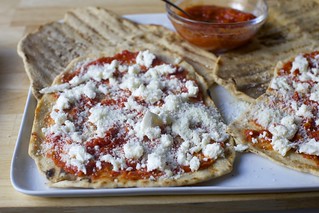
Once undersides are lightly cooked, remove doughs from grill and place cooked-side-up on a large tray. Thinly coat each cooked top with prepared sauce, then scatter with cheese. I like to season my pizzas at this point with a little salt and pepper before cooking them.
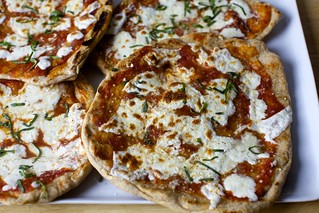
Slide each pizza back onto the grill and cook, lid down, until undersides are browned with a tiny char spot or two, and cheese has melted. If you abhor a pale pizza top, you could run these under your oven’s broiler for a minute for a toastier lid, but we rarely bother as the whole point is to cook and eat outside. Finish with fresh basil and eat immediately.
A Couldn’t-Be-Simpler Pizza Dough
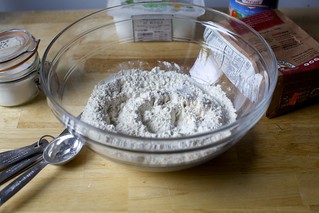
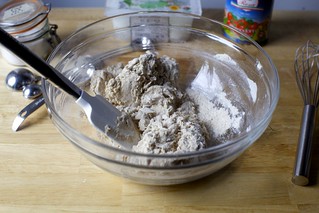
- 2 cups (260 grams) all-purpose or bread flour, feel free to swap out some (I do 1/3) with whole wheat flour
- 1 1/4 teaspoons (half a packet) instant or active dry yeast
- A heaped 1/4 teaspoon fine sea or table salt
- 3/4 cup room temperature water
Not using it right now? Place it in the fridge for up to 3 days until 1 to 2 hours before you need it, then bring it back to room temperature.
Source: http://feedproxy.google.com/~r/smittenkitchen/~3/bXO2NpxagtU/